Patriotic Oreo Balls-Easy Festive Dessert Recipe
Patriotic Oreo Balls are more than just a delightful treat; they’re a vibrant edible embodiment of celebration and joy! I’ve always found that these no-bake wonders capture the spirit of any festivity, especially when we’re looking to add a pop of red, white, and blue to our gatherings. What is it about these simple, yet stunning, Patriotic Oreo Balls that makes them so universally loved? It’s their effortless charm, the satisfying crunch of the crushed Oreos, the creamy sweetness of the cream cheese, and of course, the dazzling patriotic decorations that make them the star of any dessert table. They’re incredibly easy to make, which means more time spent enjoying them and less time stressing in the kitchen. Whether you’re gearing up for the Fourth of July, Memorial Day, or just want to infuse a little extra cheer into your day, these Patriotic Oreo Balls are the perfect answer.
Get ready to impress!
Patriotic Oreo Balls
Get ready to wow your friends and family with these incredibly easy and absolutely delicious Patriotic Oreo Balls! Perfect for Fourth of July BBQs, Memorial Day picnics, or any celebration where a touch of red, white, and blue is needed, these no-bake treats are a guaranteed crowd-pleaser. The combination of rich, crushed Oreos and creamy cream cheese, all dipped in vibrant candy melts, creates a delightful burst of flavor and texture that’s simply irresistible. Plus, they look so festive!
Ingredients:
Crafting Your Festive Treats
This recipe is wonderfully straightforward, making it a fantastic option for bakers of all skill levels, including kids who want to help out. The key to success is starting with properly softened cream cheese, which will ensure a smooth, well-combined mixture. Taking the time to ensure your Oreos are finely crushed will also contribute to a better texture in the final product. Let’s dive into the simple steps that will bring these patriotic delights to life!
Step 1: Crushing the Cookies and Combining the Base
The foundation of our delicious Oreo Balls is, of course, the Oreo cookies themselves. You’ll want to process your entire Family Size package of Oreo cookies into fine crum extractbs. A food processor is your best friend here, making quick work of it. Pulse until you have a consistency resembling coarse sand. If you don’t have a food processor, you can place the cookies in a sturdy zip-top bag and crush them with a rolling pin or a heavy object until finely crum extractbled. Once your Oreos are crushed, transfer them to a large mixing bowl. Next, add your softened cream cheese to the bowl. Make sure the cream cheese is truly at room temperature; this is crucial for easy incorporation. If it’s too cold, it will be difficult to mix and might result in lumps. Using a spatula or a sturdy spoon, mix the cream cheese and Oreo crum extractbs together until they are thoroughly combined and form a dough-like consistency. It should hold together when you press it between your fingers.
Step 2: Rolling the Oreo Balls
Now comes the fun part: shaping our Oreo mixture! Take small portions of the Oreo and cream cheese dough and roll them into balls, about 1-inch in diameter. A cookie scoop can be helpful for ensuring consistent sizing. As you roll each ball, try to keep your hands clean; the mixture can be a bit sticky. If it becomes too sticky, you can lightly dampen your hands with water or dust them with a tiny bit of powdered sugar (though this is usually not necessary if your cream cheese was properly softened). Place the rolled balls onto a baking sheet lined with parchment paper. This prevents them from sticking and makes it easier to transfer them later. Continue this process until you have used up all of the Oreo mixture. You should get quite a few delicious little balls from one batch!
Step 3: Setting the Oreo Balls
Once all of your Oreo balls are rolled and placed on the parchment-lined baking sheet, it’s time to let them firm up. This step is important because it will make them much easier to dip in the candy melts without them falling apart. Place the baking sheet into the freezer for about 15-20 minutes, or into the refrigerator for at least 30-45 minutes. You want them to be firm to the touch, but not frozen solid. This chilling period will allow the cream cheese to firm up, ensuring your balls maintain their shape during the melting and dipping process.
Step 4: Melting and Coloring the Candy Melts
While your Oreo balls are chilling, you can start preparing your candy melts. You’ll be using red and blue candy melts, and a small amount of white melting wafers. Divide your red candy melts into one microwave-safe bowl and your blue candy melts into another. Add a small amount of vegetable shortening (about 1 teaspoon per cup of candy melts) to each bowl. This helps to create a smoother, more fluid consistency for dipping. Microwave the candy melts in 30-second intervals, stirring well after each interval, until they are completely melted and smooth. Be careful not to overheat them, as they can seize up. In a separate small microwave-safe bowl, melt your Ghirardelli white melting wafers with about ½ teaspoon of vegetable shortening, following the same melting process.
Step 5: Dipping and Decorating Your Patriotic Masterpieces
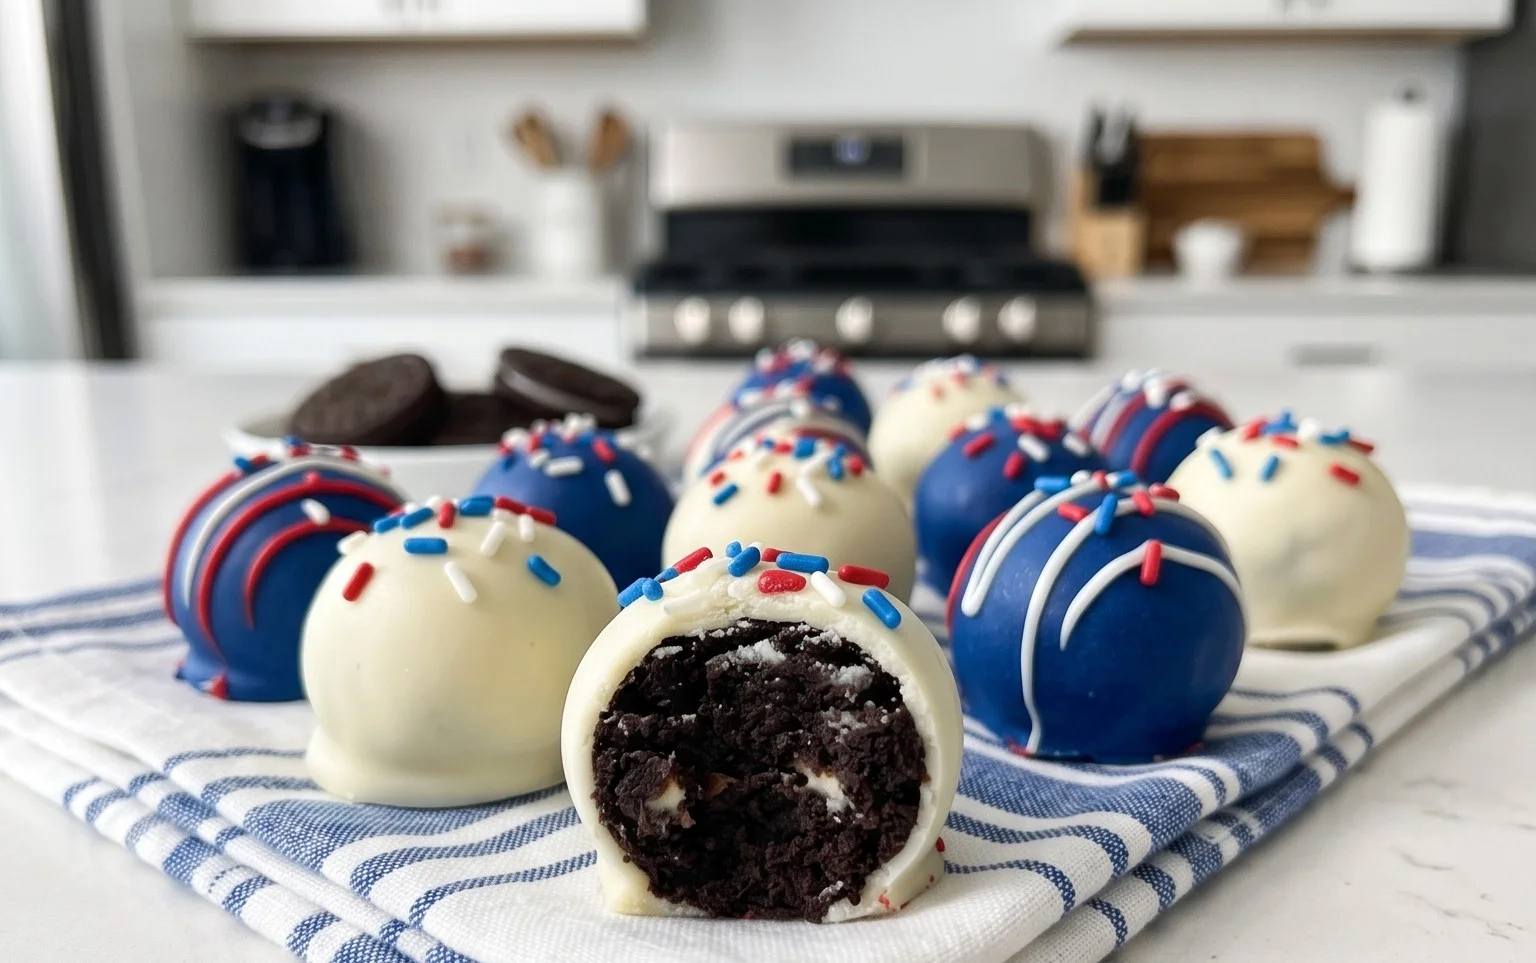
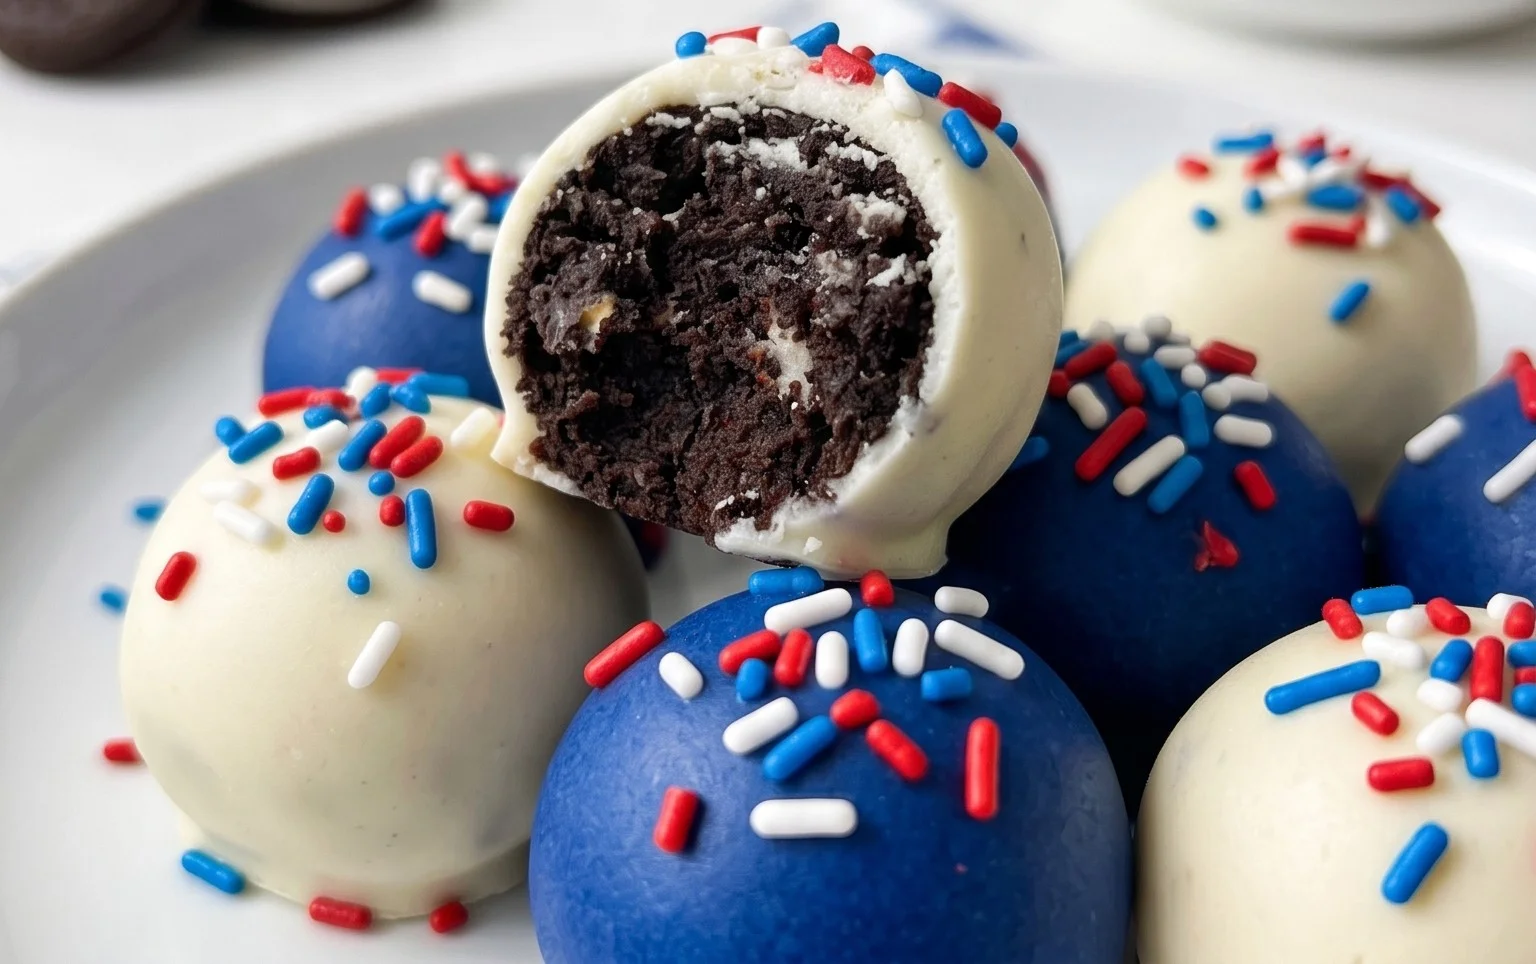
Now for the most visually exciting part! Remove your chilled Oreo balls from the freezer or refrigerator. Take one chilled ball at a time and dip it into your melted candy coating. A fork or a toothpick is useful for this. Gently swirl the ball in the melted candy until it’s fully coated. Lift the ball out, allowing any excess coating to drip back into the bowl. You can tap the fork gently on the side of the bowl to help this process. Place the dipped ball back onto the parchment-lined baking sheet. For a patriotic look, you can alternate dipping your Oreo balls in red and blue candy melts. For the white accents and stars, once the red and blue coatings have set slightly but are not completely hardened, you can use a spoon or a piping bag with a small tip to drizzle melted white chocolate over the red and blue balls. Immediately after drizzling, sprinkle with your white star confetti sprinkles while the white chocolate is still wet. You can also create stripes by alternating the colors. For example, dip a ball in blue, let it set slightly, then drizzle thin red stripes over it. The possibilities for creative decoration are endless! Allow the candy coating to fully set. This can take about 10-15 minutes at room temperature, or you can speed up the process by placing the baking sheet back into the refrigerator for a few minutes.
These Patriotic Oreo Balls are not only a treat for the taste buds but also a beautiful addition to any festive table. Enjoy making and sharing them!
Conclusion:
There you have it! These Patriotic Oreo Balls are an absolute showstopper, combining the irresistible crunch of Oreos with the creamy indulgence of cream cheese, all dipped in a vibrant patriotic coating. They’re incredibly easy to make, making them the perfect no-bake treat for any summer celebration, from Fourth of July BBQs to Memorial Day picnics, or even just a fun weekend project. The combination of simple ingredients and minimal effort results in a dessert that’s both visually stunning and deliciously satisfying. I truly hope you’ll give this recipe a try – it’s guaranteed to be a crowd-pleaser!
Looking for serving ideas? These delightful treats are fantastic on their own, but they also look beautiful arranged on a platter, perhaps alongside fresh berries or a dollop of whipped cream. For variations, consider adding a pinch of red or blue food coloring to the cream cheese mixture before rolling, or even incorporating a bit of white chocolate into the coating for an extra layer of flavor and texture. You could also sprinkle them with edible glitter or patriotic sprinkles for an added festive touch. Experiment and make them your own!
Frequently Asked Questions:
Can I make these Patriotic Oreo Balls ahead of time?
Absolutely! These are perfect for making ahead. You can store them in an airtight container in the refrigerator for up to a week. Just make sure they’re fully set before stacking them, or place parchment paper between layers to prevent sticking.
What kind of chocolate is best for coating?
While candy melts are easiest for a smooth, vibrant coating, good quality white chocolate chips that have been tempered can also work beautifully. If using white chocolate, you might need to add a little vegetable shortening or coconut oil to achieve the desired melting consistency.
Are there any dairy-free alternatives for this recipe?
While this recipe relies on dairy, you can experiment with dairy-free cream cheese and gluten-free or dairy-free chocolate alternatives for a modified version. The texture and taste may vary slightly.
Patriotic Oreo Balls
Festive no-bake treats perfect for holidays and celebrations, featuring layers of crushed Oreos, cream cheese, and patriotic colored candy melts, topped with white stars.
Ingredients
-
1 lb 2.12 oz Family Size package Oreo Cookies
-
8 ounce block cream cheese, softened
-
12 ounce bag red candy melts
-
12 ounce bag blue candy melts
-
⅓ cup Ghirardelli white melting wafers
-
White star confetti sprinkles
Instructions
-
Step 1
Crush the Oreo cookies into fine crumbs using a food processor or by placing them in a zip-top bag and crushing with a rolling pin. Reserve about 2 tablespoons of crumbs for later. -
Step 2
In a large bowl, combine the Oreo crumbs (minus the reserved amount) with the softened cream cheese. Mix until well combined and a dough forms. -
Step 3
Roll the mixture into 1-inch balls and place them on a parchment-lined baking sheet. Chill in the refrigerator for at least 30 minutes. -
Step 4
Melt the red candy melts according to package directions. Dip half of the chilled Oreo balls into the melted red candy, ensuring they are fully coated. Place back on the parchment-lined sheet. -
Step 5
Melt the blue candy melts according to package directions. Dip the remaining chilled Oreo balls into the melted blue candy. Place back on the parchment-lined sheet. -
Step 6
Melt the Ghirardelli white melting wafers. Drizzle the melted white chocolate over the red and blue dipped Oreo balls for a decorative effect. -
Step 7
While the white chocolate is still wet, sprinkle with white star confetti sprinkles and the reserved Oreo crumbs. -
Step 8
Allow the candy coating to set completely. Refrigerate until firm, then serve.
Important Information
Nutrition Facts (Per Serving)
It is important to consider this information as approximate and not to use it as definitive health advice.
Allergy Information
Please check ingredients for potential allergens and consult a health professional if in doubt.