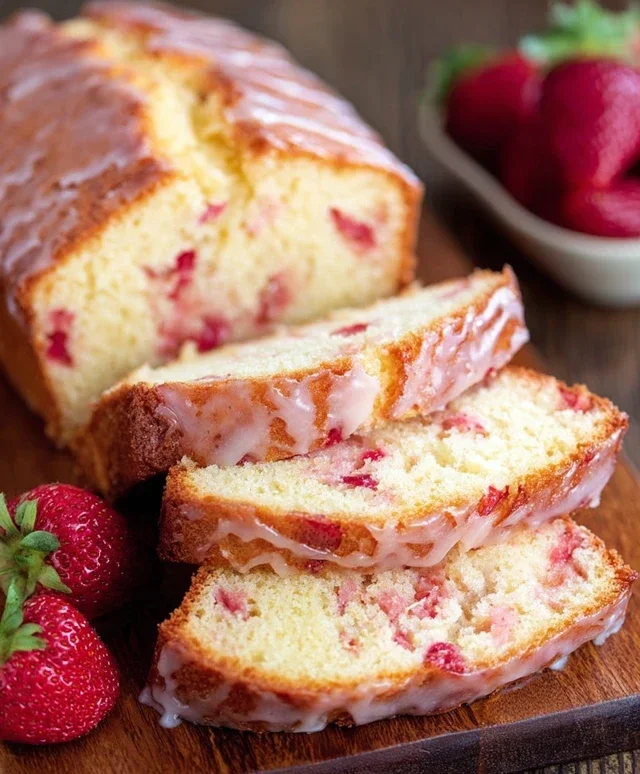
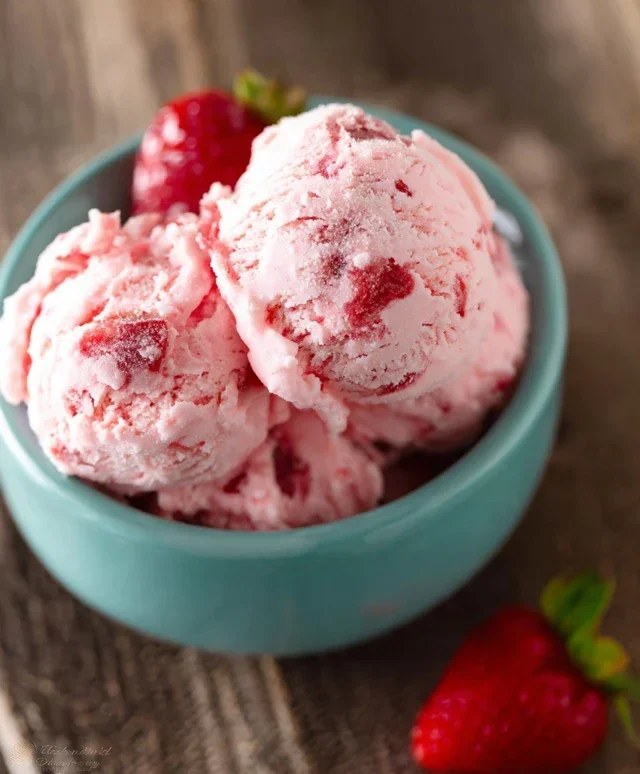
Easy Homemade Strawberry Ice Cream Recipe
Homemade strawberry ice cream is a dream come true for any dessert lover, especially when summer’s bounty of ripe, juicy strawberries is at its peak. There’s something undeniably magical about scooping into a bowl of creamy, cold perfection that bursts with the vibrant, sweet-tart flavor of fresh fruit. Forget those artificial pink imposters; our homemade strawberry ice cream delivers an authentic taste that’s both nostalgic and incredibly satisfying. We love it because it’s the ultimate expression of pure strawberry goodness, transforming simple ingredients into a luxurious treat. What makes this recipe truly special is its simplicity, allowing the natural sweetness and delicate aroma of the strawberries to shine through without overwhelming artificial flavors or preservatives. Get ready to experience the best homemade strawberry ice cream you’ve ever tasted!
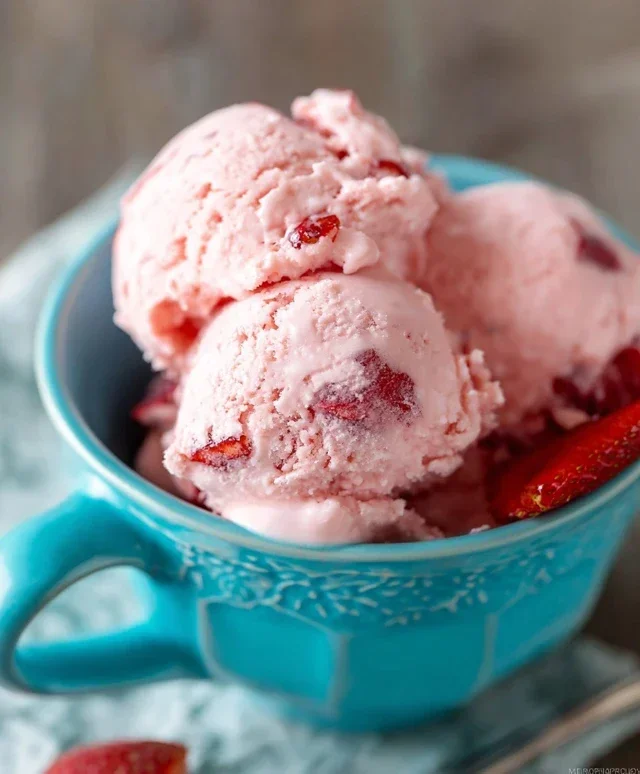
Homemade Strawberry Ice Cream
There’s nothing quite like the taste of fresh, homemade strawberry ice cream. The vibrant sweetness of ripe strawberries, the creamy richness of dairy, and that irresistible chill – it’s a summer staple and a year-round treat. While store-bought versions are convenient, the depth of flavor and pure, unadulterated joy you get from making it yourself is truly unmatched. Forget complicated custard bases and fancy churning techniques; this recipe is designed for simplicity and maximum strawberry impact. We’re going to capture the essence of fresh berries in every spoonful, creating a frozen dessert that tastes like pure sunshine.
Ingredients:
Now, let’s get down to the delicious business of transforming these simple ingredients into a frozen masterpiece.
Preparing the Strawberry Base
This is where the magic begin extracts. We want to extract as much strawberry flavor as possible and ensure a smooth, delightful texture in our final ice cream.
1. Macerate the Strawberries: In a medium bowl, combine the diced strawberries with the honey, granulated sugar, and lemon juice. The honey adds a subtle floral sweetness and helps to preserve the strawberries’ vibrant color, while the sugar draws out their natural juices. The lemon juice is a secret weapon – it brightens the berry flavor without making the ice cream taste sour, and it also helps to break down the strawberries slightly, contributing to a smoother texture. Gently stir everything together until the sugar begin extracts to dissolve. Let this mixture sit at room temperature for at least 30 minutes, or even up to an hour. You’ll notice that the strawberries start to soften and release a beautiful, ruby-red syrup. This process is called maceration, and it’s key to intensifying the strawberry flavor. Give it a gentle stir every now and then to help things along.
2. Puree the Strawberries: Once the strawberries have macerated and released their juices, it’s time to create our smooth strawberry base. You have a couple of options here. For a super-smooth ice cream, use an immersion blender directly in the bowl to puree the strawberries and their syrup until completely smooth. Alternatively, you can transfer the mixture to a regular blender or a food processor and process until you achieve a silky consistency. If you prefer a little bit of texture in your ice cream, you can pulse it instead of pureeing it all the way, leaving small pieces of strawberry intact. Don’t over-process if you want some bits of fruit.
Creating the Ice Cream Mixture
With our vibrant strawberry puree ready, we’ll now combine it with the dairy to create the rich and creamy foundation for our ice cream.
3. Combine Dairy and Flavorings: In a separate, larger bowl or a pitcher, pour in the heavy whipping cream and the half and half. Add the vanilla extract to this mixture. The heavy whipping cream is essential for that luxurious, rich mouthfeel that defines good ice cream. The half and half provides a touch of lightness, ensuring the ice cream isn’t overly dense. Whisk these dairy components together thoroughly to ensure they are well combined. The vanilla extract will complement the strawberry flavor beautifully, adding another layer of deliciousness without overpowering the star of the show.
4. Incorporate the Strawberry Puree: Now, it’s time to bring our strawberry and dairy components together. Gently fold the prepared strawberry puree into the cream and half and half mixture. Stir until everything is just combined and you have a beautiful, uniform pink color throughout. Be careful not to overmix at this stage. The goal is to evenly distribute the strawberry flavor without incorporating too much air, which can affect the final texture. Some recipes might call for cooking this mixture, but for this simple approach, we’re going for a no-cook base that relies on the chilling and churning process to achieve its perfect consistency.
Churning and Freezing Your Homemade Ice Cream
The final steps involve transforming our liquid base into frozen, scoopable delight.
5. Chill the Mixture (Crucial Step): Before you can churn your ice cream, the base needs to be thoroughly chilled. This is a non-negotiable step for achieving the best texture. Pour the combined strawberry and dairy mixture into an airtight container and refrigerate for at least 4 hours, or preferably overnight. The colder the base, the faster it will freeze during the churning process, resulting in smaller ice crystals and a smoother, creamier ice cream. If you have an ice cream maker, make sure the bowl of your ice cream maker is also frozen according to its manufacturer’s instructions. A well-chilled base is paramount to success.
6. Churn and Harden: Once your base is thoroughly chilled and your ice cream maker is ready, it’s time to churn. Pour the chilled strawberry mixture into your ice cream maker and churn according to the manufacturer’s instructions. This typically takes about 20-30 minutes. The ice cream will transform from a liquid to a soft-serve consistency. The churning process incorporates air and breaks down ice crystals, creating that signature smooth texture. When the ice cream has reached a firm, soft-serve consistency, transfer it to a freezer-safe container. Press a piece of parchment paper or plastic wrap directly onto the surface of the ice cream to prevent ice crystals from forming on top. Then, cover the container tightly. Freeze for at least 4-6 hours, or until firm enough to scoop. The longer it freezes, the harder it will become.
Enjoy every delicious, homemade scoop of your fresh strawberry ice cream! It’s a reward for your effort and a testament to the simple joy of creating something wonderful from scratch.
Conclusion:
There you have it – your guide to creating truly divine homemade strawberry ice cream! This recipe is a triumph because it delivers that pure, unadulterated strawberry flavor that store-bought versions often can’t match. The combination of fresh, ripe strawberries, creamy dairy, and a touch of sweetness creates a dessert that’s both refreshingly simple and incredibly satisfying. It’s a labor of love, but the reward of a perfectly churned, vibrant pink scoop is absolutely worth it. Imagin extracte the delight of your friends and family when you present them with this delightful treat!
I highly recommend serving this glorious strawberry ice cream just as it is, perhaps with a few fresh strawberry slices or a sprig of mint for an extra touch of elegance. It’s also wonderful piled high on a warm brownie or served alongside a slice of angel food cake. For variations, feel free to add a swirl of balsamic glaze for a sophisticated tang, a handful of chocolate chips for a delightful textural contrast, or even a hint of basil for an unexpected herbaceous note. Don’t be afraid to experiment and make this recipe your own! I truly hope you give this homemade strawberry ice cream a try; I’m confident you’ll fall in love with the process and the result.
Frequently Asked Questions:
Q: My strawberry ice cream isn’t as smooth as I’d hoped. What went wrong?
A: Achieving a smooth texture often comes down to a few factors. Ensure your base is thoroughly chilled before churning. Overfilling your ice cream maker can also prevent proper churning. If you’re using an ice cream maker, make sure it’s been properly pre-frozen according to the manufacturer’s instructions. Additionally, for an even smoother result, you can strain the strawberry puree to remove any seeds before adding it to the base. Properly chilling the mixture also helps prevent large ice crystals from forming.
Q: Can I make this recipe without an ice cream maker?
A: Absolutely! While an ice cream maker makes the process easier, you can achieve a delightful result using the no-churn method. Whisk together your condensed milk and heavy cream until stiff peaks form. Then, fold in your prepared strawberry puree. Pour this mixture into a freezer-safe container, cover, and freeze. You’ll want to stir the mixture vigorously every 30-45 minutes for the first 2-3 hours to break up ice crystals and create a creamier texture. It takes a little more manual effort, but it’s a fantastic alternative!
Homemade Strawberry Ice Cream
A delightful homemade strawberry ice cream recipe, perfect for a sweet treat. This recipe uses fresh strawberries for an authentic flavor and a creamy texture.
Ingredients
-
1 1/2 cups strawberries, hulled and diced
-
2 Tbsp honey
-
1/2 cup granulated sugar
-
1 tsp lemon juice
-
1 cup heavy whipping cream
-
1/2 cup half and half
-
1 tsp vanilla extract
Instructions
-
Step 1
In a bowl, combine the diced strawberries, honey, granulated sugar, and lemon juice. Stir well and let it sit for about 15-20 minutes to allow the strawberries to macerate. -
Step 2
Mash the strawberries with a fork or potato masher until you reach your desired consistency. You can leave some chunks for texture. -
Step 3
In a separate bowl, whisk together the heavy whipping cream, half and half, and vanilla extract until well combined. -
Step 4
Gently fold the mashed strawberry mixture into the cream mixture. -
Step 5
Pour the mixture into an ice cream maker and churn according to the manufacturer’s instructions. This typically takes about 20-30 minutes. -
Step 6
Once churned, transfer the ice cream to an airtight container and freeze for at least 2-4 hours to firm up before serving.
Important Information
Nutrition Facts (Per Serving)
It is important to consider this information as approximate and not to use it as definitive health advice.
Allergy Information
Please check ingredients for potential allergens and consult a health professional if in doubt.