Easter Bunny Coconut Tails-Sweet Treat Recipe
Easter Bunny Coconut Tails are the undeniably adorable and utterly delicious treat that your holiday celebrations have been missing! Imagin extracte tiny, fluffy mounds of shredded coconut, shaped into whimsical bunny tails, each one a perfect bite of sweet, chewy goodness. These delightful confections have become a springtime favorite for so many reasons. Children adore their playful presentation, and adults appreciate their delicate sweetness that doesn’t overpower. What truly makes these Easter Bunny Coconut Tails special is their simplicity. They’re incredibly easy to make, making them a fantastic activity to do with kids, and they require minimal ingredients, proving that extraordinary flavors can come from the most humble begin extractnings. They bring a touch of playful magic to any Easter basket or dessert table, guaranteed to bring smiles all around.
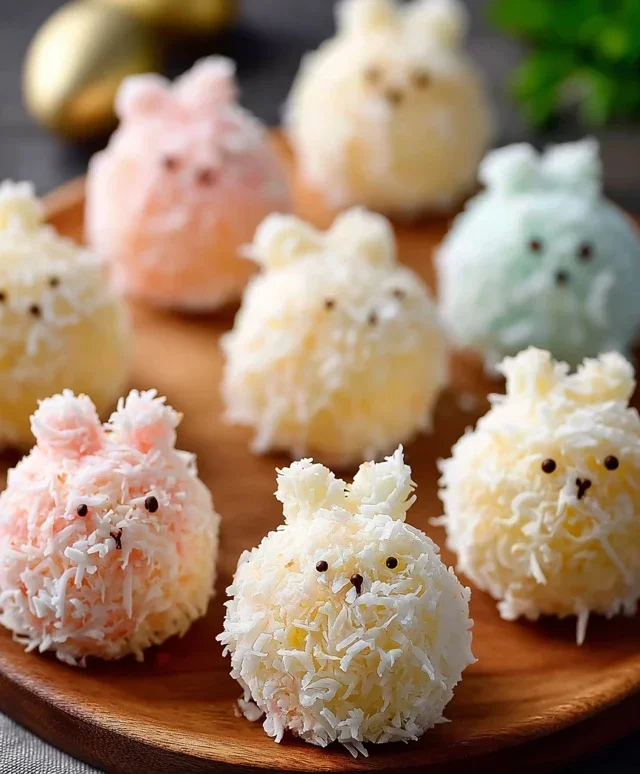
Easter Bunny Coconut Tails
Get ready to hop into Easter with these utterly adorable and ridiculously easy Easter Bunny Coconut Tails! These sweet treats are sure to delight both kids and adults alike, bringin extractg a burst of sunshine and coconutty goodness to your holiday table. They’re the perfect no-bake confection for a fun family activity or a charming addition to your Easter basket fillers. Imagin extracte fluffy, snow-white coconut “tails” dipped in creamy white chocolate and adorned with delicate pink ears – they’re almost too cute to eat!
These tails are wonderfully versatile. You can serve them as a standalone sweet, use them to decorate cakes and cupcakes, or even bundle them up as sweet party favors. The beauty of this recipe lies in its simplicity. With just a few key ingredients and minimal effort, you’ll be creating a delightful Easter confection that looks and tastes like you spent hours in the kitchen. So, let’s gather our ingredients and get ready to whip up some bunny magic!
Ingredients:
Crafting Your Coconut Tails
The process of making these Easter Bunny Coconut Tails is delightfully straightforward, making it an ideal project for bakers of all skill levels, especially those with little helpers eager to join in the fun. We’ll start by creating our fluffy coconut base, which will form the body of our adorable tails.
1. Preparing the Coconut Base: In a medium microwave-safe bowl, combine the 1½ cups of mini marshmallows and the ¼ cup of butter. Place this bowl in the microwave and heat on high for 30-second intervals, stirring well after each interval, until the marshmallows are completely melted and the mixture is smooth and gooey. This usually takes about 1 to 1.5 minutes in total. Be careful not to overheat, as this can make the marshmallows tough. Once melted, stir in the 1 teaspoon of vanilla extract until it’s fully incorporated. This vanilla adds a lovely warmth and depth of flavor to our coconut tails.
2. Incorporating the Coconut: To the melted marshmallow and butter mixture, add the 2 cups of shredded coconut. Using a sturdy spatula or your hands (lightly greased with a little cooking spray or butter to prevent sticking), mix the coconut thoroughly into the marshmallow mixture until it is evenly coated. You want every strand of coconut to be sticky and bound together. This mixture will be quite sticky, so a little greasing of your hands can be very helpful when forming the tails.
3. Shaping the Bunny Tails: Once the coconut mixture is well combined and slightly cooled (enough to handle comfortably), it’s time to shape our bunny tails. Take small portions of the mixture, about 1 to 1.5 tablespoons each, and roll them between your palms into irregular oval or slightly teardrop shapes. These are meant to resemble fluffy bunny tails, so don’t worry about perfect symmetry. Aim for a size that feels substantial but not overwhelmingly large. As you shape each tail, you can place it on a parchment-lined baking sheet. It’s a good idea to have your parchment paper ready before you start shaping to keep things efficient.
4. Melting the White Chocolate: While your shaped coconut tails are resting, prepare your white chocolate coating. In a separate microwave-safe bowl, add the 1 cup of white chocolate chips. Microwave in 30-second intervals, stirring thoroughly after each interval, until the white chocolate is completely melted and smooth. Be patient with white chocolate, as it can seize if overheated or if there’s any water present. You can also melt the white chocolate using a double boiler method if you prefer. Once melted, stir in a tiny bit of coconut oil (about ½ teaspoon, optional) to make it smoother and more fluid for dipping.
5. Dipping and Decorating: Now for the fun part – decorating! Dip each coconut tail about two-thirds of the way into the melted white chocolate, letting any excess drip back into the bowl. You can use a fork or a toothpick to help gently coat the tails and then lift them onto the parchment-lined baking sheet. While the white chocolate is still wet, melt your pink candy melts according to package directions (usually in the microwave in short intervals, stirring frequently). Dip a toothpick into the melted pink candy melts and carefully create two small “ears” on the top of each coconut tail, just above the white chocolate line. You can also add a tiny pink dot for a nose if you like! Allow the chocolate to set completely, which can take about 30 minutes at room temperature or faster in the refrigerator.
Once the chocolate has hardened, your delightful Easter Bunny Coconut Tails are ready to be enjoyed! Store them in an airtight container at room temperature for up to a week. Happy Easter baking!
Conclusion:
And there you have it! Our delightful Easter Bunny Coconut Tails are sure to hop right into your heart and onto your dessert table. These treats are wonderfully simple to make, making them perfect for a fun family baking project. The combination of fluffy coconut and sweet white chocolate is simply irresistible, and their adorable bunny tail shape adds an extra touch of Easter magic. They’re not just a treat; they’re a celebration!
I love serving these alongside a festive Easter brunch or as a special surprise in an Easter basket. They also make a charming addition to any springtime gathering. For variations, feel free to experiment with different colored sprinkles, a drizzle of milk chocolate, or even a hint of lemon zest in the coconut mixture for a brighter flavor. Don’t be afraid to get creative! I truly encourage you to give these Easter Bunny Coconut Tails a try – I’m confident you’ll love them as much as I do. Happy Easter baking!
Frequently Asked Questions:
Can I make these ahead of time?
Absolutely! You can prepare the coconut mixture and shape the “tails” a day or two in advance. Once shaped, store them in an airtight container in the refrigerator. When you’re ready to serve, simply melt your white chocolate and dip them. This makes it super convenient for busy Easter preparations.
What’s the best way to store leftover coconut tails?
Store any leftover Easter Bunny Coconut Tails in an airtight container at room temperature for a few days, or in the refrigerator for up to a week. If refrigerating, they might become a little firm, so allow them to sit at room temperature for about 15-20 minutes before enjoying for the best texture.
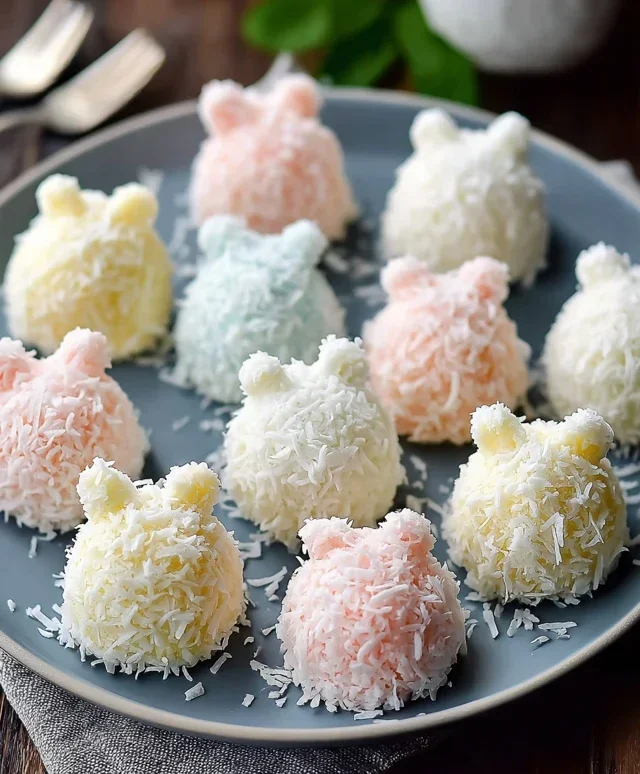
Easter Bunny Coconut Tails
Sweet and fluffy coconut tails dipped in white chocolate and decorated with pink candy melts, perfect for Easter.
Ingredients
-
2 cups shredded coconut
-
1½ cups mini marshmallows
-
¼ cup butter
-
1 teaspoon vanilla extract
-
1 cup white chocolate chips
-
Pink candy melts for decoration
Instructions
-
Step 1
In a saucepan, melt together the butter, mini marshmallows, and vanilla extract over low heat, stirring constantly until smooth. -
Step 2
Remove from heat and stir in the shredded coconut until well combined. -
Step 3
Shape the mixture into tail shapes. Place on a parchment-lined baking sheet. -
Step 4
In a microwave-safe bowl, melt the white chocolate chips in 30-second intervals, stirring between each, until smooth. -
Step 5
Dip each coconut tail into the melted white chocolate, letting any excess drip off. -
Step 6
Place the dipped tails back onto the parchment-lined baking sheet. -
Step 7
Melt the pink candy melts according to package directions. Drizzle or pipe onto the white chocolate-dipped tails for decoration. -
Step 8
Allow the chocolate and candy melts to set completely before serving.
Important Information
Nutrition Facts (Per Serving)
It is important to consider this information as approximate and not to use it as definitive health advice.
Allergy Information
Please check ingredients for potential allergens and consult a health professional if in doubt.