Easy Cherry Pie Bombs Recipe – A Sweet Treat
Cherry Pie Bombs are about to become your new favorite dessert obsession. If you’re anything like me, the mere mention of cherry pie conjures up images of flaky crust, warm, sweet-tart filling, and that comforting, nostalgic feeling. But what if you could capture all that iconic flavor in a perfectly portioned, incredibly shareable bite? That’s precisely the magic of these delightful Cherry Pie Bombs. They take everything we adore about classic cherry pie – the vibrant fruit, the buttery pastry – and condense it into irresistible, individual explosions of pure joy. Forget wrestling with a whole pie; these little wonders are designed for immediate gratification, making them perfect for parties, potlucks, or just treating yourself after a long day. Get ready to discover a whole new way to fall in love with cherry pie!
Cherry Pie Bombs
Get ready for a flavor explosion! These Cherry Pie Bombs are a delightful twist on a classic, transforming the beloved taste of cherry pie into irresistible, bite-sized treats. Perfect for parties, a special dessert, or whenever that sweet craving strikes, these little wonders are surprisingly easy to make. We’re taking the convenience of canned biscuits and infusing them with a burst of sweet cherry goodness, then showering them with a luscious glaze. Trust me, one bite and you’ll be hooked.
Ingredients:
Let’s Get Cooking!
Preparing these Cherry Pie Bombs is a fun and rewarding process. The key is to work efficiently and ensure everything is ready before you start frying. We’ll be creating little pockets of cherry goodness from our flaky biscuits.
First things first, let’s get our cherry filling prepped. Open up that can of cherry pie filling. You want to give it a gentle stir to ensure the cherries are evenly distributed. If the filling seems a little too thick, you can add a tablespoon of water to loosen it up slightly. Set this aside for now, as we’ll be using it to stuff our biscuit dough.
Next, we’ll prepare the biscuit dough. Gently separate the Grands “Big” biscuits from the packagin extractg. Try not to overwork or flatten them too much at this stage, as we want to preserve that flaky texture. Lay out a biscuit on a clean, lightly floured surface. Using your fingers or a small rolling pin, gently press down the center of the biscuit to create a small indentation. This will be the space where our cherry filling will go. You don’t need to flatten it paper-thin; just create a shallow well. Repeat this process with all of your biscuits.
Now comes the fun part – filling the biscuits! Take about one to two tablespoons of the prepared cherry pie filling and carefully spoon it into the indentation you created in each biscuit. Be generous, but not so overflowing that it becomes difficult to seal. We want a good amount of cherry goodness in every bite, but we also need to be able to close up the biscuit.
Once you have your filling in place, it’s time to seal them up into little bombs. Gently bring the edges of the biscuit up and around the filling, pinching them together firmly to create a senon-alcoholic aled pocket. You want to make sure there are no gaps where the filling can escape during the frying process. This is a crucial step to ensure your Cherry Pie Bombs hold their shape and delicious filling. You should end up with little dough balls, tightly senon-alcoholic aled around the cherry filling. Make sure all seams are well-pinched.
Now, let’s get ready for frying. You’ll need a heavy-bottomed pot or a Dutch oven for this. Pour enough vegetable oil into the pot to reach a depth of about 2 to 3 inches. We want enough oil so that the biscuits can be fully submerged. Heat the oil over medium heat until it reaches approximately 350°F (175°C). A kitchen thermometer is ideal for this, but if you don’t have one, you can test the oil by dropping a tiny piece of biscuit dough into it. If it sizzles immediately and floats to the top, the oil is ready. Be careful not to overheat the oil, as this can cause the outside of the biscuits to burn before the inside is cooked through.
Carefully, and I mean carefully, place a few of the filled biscuit bombs into the hot oil. Don’t overcrowd the pot; you should only fry 2-3 at a time. This allows the oil temperature to remain stable and ensures even cooking. Use a slotted spoon or spider strainer to gently lower them into the oil. Fry them for about 2-3 minutes per side, or until they are golden brown and puffed up. They will float to the surface as they cook. Once they’ve achieved a beautiful golden-brown color on all sides, carefully remove them from the oil with your slotted spoon and place them on a paper towel-lined plate or wire rack to drain off any excess oil.
While your Cherry Pie Bombs are cooling slightly, let’s whip up a simple yet decadent glaze. In a medium bowl, whisk together the powdered sugar and milk. Start with the ¼ cup of milk and gradually add a tiny bit more if needed to reach your desired drizzling consistency. You want a glaze that is thick enough to coat the bombs but thin enough to drizzle easily. For an extra touch of shine and a slightly smoother texture, stir in the tablespoon of light corn syrup. This is the secret ingredient that gives the glaze that irresistible sheen.
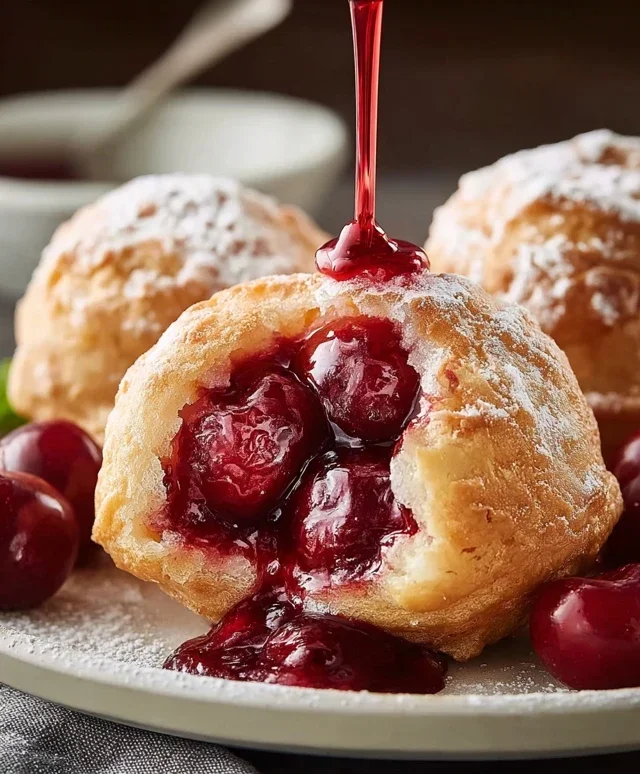
Once your Cherry Pie Bombs have cooled for just a few minutes – they should still be warm – you can start drizzling! Take a spoon and generously drizzle the prepared glaze over the warm bombs. The warmth of the bombs will help the glaze melt slightly and adhere beautifully. You can make it as messy or as neat as you like. For an even more festive touch, you could sprinkle some red or pink edible glitter or even some chopped nuts over the glaze before it sets.
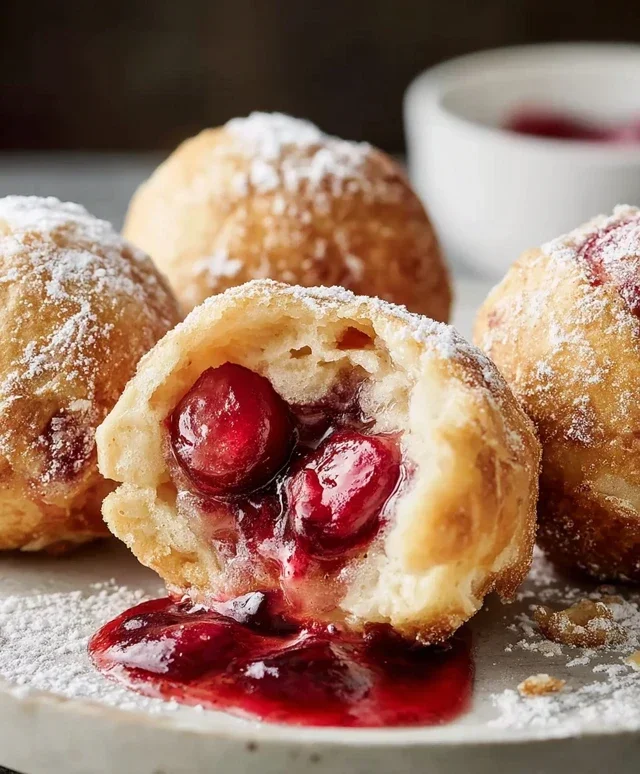
Serve these warm and enjoy the explosion of flavors! The flaky biscuit exterior gives way to a warm, gooey cherry filling, all topped off with a sweet, creamy glaze. They are truly a taste of cherry pie paradise in every bite.
Conclusion:
And there you have it – our delightful Cherry Pie Bombs! These little bursts of joy are incredibly easy to make and deliver all the classic flavors of a traditional cherry pie in a perfectly portioned, handheld treat. The combination of flaky pastry and sweet, tangy cherry filling is simply irresistible, making them a guaranteed crowd-pleaser for any occasion. Whether you’re hosting a party, looking for a fun dessert to make with kids, or simply craving a sweet indulgence, these Cherry Pie Bombs are the answer!
I love serving them warm, perhaps with a dollop of whipped cream or a scoop of vanilla ice cream for an extra layer of decadence. They’re also fantastic on their own! Don’t be afraid to experiment with variations. You could try adding a pinch of cinnamon to the cherry filling for a warmer spice, or even swap out the cherries for blueberries or a mixed berry blend. The possibilities are endless!
I truly encourage you to give these Cherry Pie Bombs a try. They’re a testament to how simple ingredients can create something truly spectacular. So grab your cherries and get baking – I promise you won’t regret it!
Frequently Asked Questions:
Can I make the cherry filling ahead of time?
Absolutely! You can prepare the cherry filling a day or two in advance and store it in an airtight container in the refrigerator. This can save you time on baking day, making the assembly process even quicker.
What if I don’t have fresh cherries? Can I use frozen or canned?
Yes, you certainly can! If using frozen cherries, be sure to thaw them completely and drain off any excess liquid before incorporating them into the filling. For canned cherries, drain them well and consider reducing the added sugar slightly, as canned cherries are often packed in syrup.
Cherry Pie Bombs
Sweet and decadent fried biscuit bites filled with cherry pie filling, drizzled with a simple glaze.
Ingredients
-
Vegetable oil, for frying
-
16.3 ounces Grands “Big” biscuits, flaky
-
21 ounces cherry pie filling
-
2 cups powdered sugar
-
1/4 cup milk
-
1 tablespoon light corn syrup
Instructions
-
Step 1
Prepare the cherry pie filling. If it’s too thick, you can add a tablespoon of water to make it more pliable. -
Step 2
Unroll the Grands “Big” biscuits. Gently separate them and cut each biscuit into four equal pieces. -
Step 3
Flatten each biscuit piece slightly. Place about a teaspoon of cherry pie filling in the center. Fold the biscuit dough around the filling to create a sealed ball or “bomb” shape. -
Step 4
Heat vegetable oil in a deep skillet or pot over medium-high heat to about 350°F (175°C). -
Step 5
Carefully fry the cherry pie bombs in batches, turning them occasionally, until golden brown and puffed up, about 2-3 minutes per side. -
Step 6
Remove the fried bombs with a slotted spoon and place them on a paper towel-lined plate to drain excess oil. -
Step 7
While the bombs are still warm, prepare the glaze. In a small bowl, whisk together the powdered sugar, milk, and light corn syrup until smooth. Add more milk if a thinner glaze is desired. -
Step 8
Drizzle the glaze generously over the warm cherry pie bombs.
Important Information
Nutrition Facts (Per Serving)
It is important to consider this information as approximate and not to use it as definitive health advice.
Allergy Information
Please check ingredients for potential allergens and consult a health professional if in doubt.