Easy Strawberry Danish Recipe-Homemade Pastry Delight
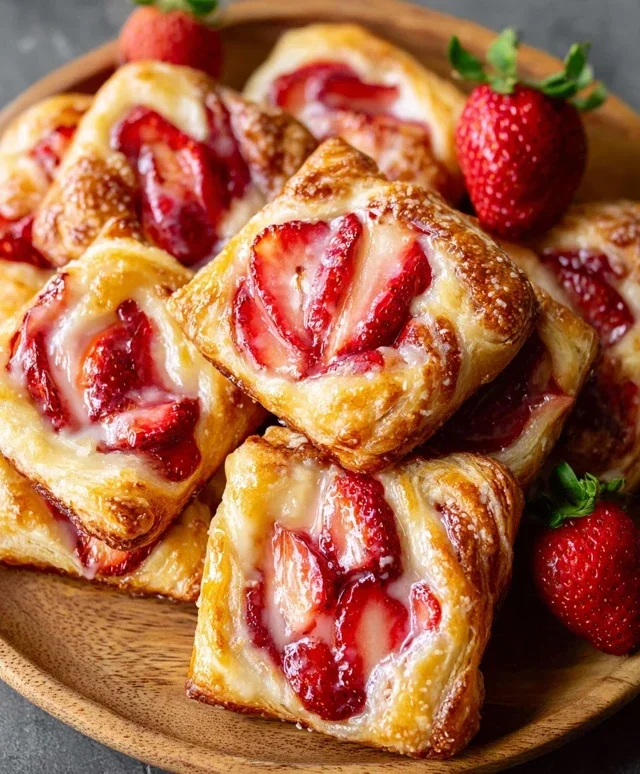
Strawberry Danish recipes are a delightful journey into flaky pastry and sweet, vibrant fruit, and today, we’re embarking on that delicious adventure together! There’s a reason the humble Strawberry Danish holds such a special place in our hearts and bakery displays. It’s that perfect symphony of textures and flavors: the shattering crispness of buttery puff pastry giving way to a creamy, often tangy cream cheese filling, all crowned with a glistening layer of sweet, sun-ripened strawberries.
Why We Adore Them
These pastries aren’t just a treat for the taste buds; they’re a visual masterpiece, a miniature edible work of art. Whether it’s a weekend brunch indulgence, a sophisticated afternoon tea offering, or simply a moment of pure self-care with a cup of coffee, a Strawberry Danish delivers. What truly sets our Strawberry Danish recipe apart is the emphasis on creating that authentic, homemade magic. We’ll guide you through achieving that impossibly light pastry and balancing the sweetness to let the natural, bright flavor of the strawberries truly shine.
Strawberry Danish Recipe
There’s something undeniably delightful about a classic Danish pastry. The flaky, buttery layers, the sweet, creamy filling, and the burst of fresh fruit – it’s a combination that’s hard to resist. While they might seem intimidating to make at home, I’m here to tell you that with a few key ingredients and a little patience, you can create these beautiful Strawberry Danish pastries in your own kitchen. They’re perfect for a special breakfast, a weekend brunch, or even an elegant afternoon treat.
The star of these danishes, of course, is the strawberry. We’ll be creating a simple, vibrant strawberry filling that complements the richness of the cream cheese and the crispness of the puff pastry beautifully. Don’t be afraid to use good quality, ripe strawberries – their natural sweetness will shine through.
Let’s get started with what you’ll need to bring these delightful danishes to life.
Ingredients:
Preparing the Strawberry Filling
The first step in creating our delicious danishes is to prepare the strawberry filling. This is where we capture the essence of fresh strawberries.
1. In a medium saucepan, combine the 4 cups of sliced strawberries with 1 tablespoon of sugar. Let them sit for about 5-10 minutes. This will help the strawberries release some of their juices, which is beneficial for creating a well-textured filling. Then, add the 1 tablespoon of cornstarch to the saucepan. Stir everything gently to ensure the cornstarch is evenly distributed. Place the saucepan over medium heat. Cook, stirring frequently, until the strawberries have softened and the mixture has thickened into a jam-like consistency. This usually takes about 8-10 minutes. You’re looking for a glossy, thick sauce where the strawberries are still somewhat intact but have softened beautifully. Once thickened, remove the pan from the heat and let the strawberry filling cool completely. It’s crucial that it’s fully cooled before you proceed, otherwise, it could melt the cream cheese filling and make the pastry soggy.
Making the Cream Cheese Filling
While the strawberry filling is cooling, we’ll prepare the luscious cream cheese filling that adds a wonderful creamy contrast to the fruity topping.
2. In a medium bowl, combine the 8 oz. of room temperature cream cheese with ½ cup of powdered sugar and 1 teaspoon of vanilla extract. Using room temperature cream cheese is essential here; it will allow for a smooth, lump-free filling. If your cream cheese is cold, it will be very difficult to mix and you’ll end up with a lumpy texture. Beat these ingredients together with an electric mixer (or a whisk if you’re feeling energetic!) until the mixture is completely smooth and creamy. Ensure you scrape down the sides of the bowl as you go to incorporate all the ingredients. This filling should be light, airy, and sweet, a perfect base for our strawberries.
Assembling the Danish Pastries
Now for the fun part – assembling our danishes! This is where the magic happens.
3. Gently unfold the thawed puff pastry sheets onto a lightly floured surface. You want to work with the puff pastry when it’s still cold but pliable. If it becomes too warm, it will be difficult to handle and won’t puff up as nicely. Using a sharp knife or a pizza cutter, cut each puff pastry sheet into four equal squares. This will give you a total of eight squares, perfect for eight danishes. Take one of the cream cheese filling mixtures and spoon about a tablespoon into the center of each puff pastry square. Then, top the cream cheese with about a tablespoon of the cooled strawberry filling. Don’t overfill them, as the filling can leak out during baking.
4. Now, let’s create the signature Danish shape. Carefully bring two opposite corners of each pastry square towards the center, over the filling, and press them together to seal. You can overlap them slightly or just bring them to meet in the middle. Then, bring the other two opposite corners towards the center and press them together, creating a beautiful folded effect with the filling peeking out in the middle. Ensure the pastry edges are senon-alcoholic aled reasonably well to prevent too much leakage. You can use a fork to lightly press down and seal the edges if you like. This folding technique creates those lovely pockets that showcase the filling.
5. Place the assembled danishes on a baking sheet lined with parchment paper. This prevents sticking and makes for easier cleanup. Brush the tops and sides of each danish with the beaten egg wash. This egg wash is crucial for achieving that golden-brown, glossy finish that makes Danish pastries look so irresistible. If you’re using the optional granulated sugar for topping, sprinkle it over the egg-washed pastries now.
Baking and Glazing
The final stages involve baking these beauties to golden perfection and adding a delightful glaze.
6. Preheat your oven to 400°F (200°C). Bake the danishes for 18-20 minutes, or until they are puffed up and beautifully golden brown. Keep an eye on them towards the end of the baking time, as puff pastry can brown quickly. Once baked, remove them from the oven and let them cool on a wire rack for about 10-15 minutes. While they are still warm, but not piping hot, you can brush them with the optional ¼ cup of strawberry jam. This adds an extra layer of fruity sweetness and shine.
7. Finally, let’s whip up a simple glaze to finish them off. In a small bowl, whisk together 1 cup of powdered sugar with ½ teaspoon of vanilla extract and 2-3 tablespoons of milk. Start with 2 tablespoons of milk and add more, a teaspoon at a time, until you reach your desired drizzling consistency. The glaze should be thick enough to coat the back of a spoon but thin enough to easily drizzle. Drizzle this glaze generously over the cooled danishes. If you prefer a less sweet danish, you can omit this glaze. However, I find it adds that perfect finishing touch.
Allow the glaze to set slightly before serving. Enjoy your homemade Strawberry Danish pastries! They are best enjoyed fresh, ideally on the day they are made, to truly appreciate the flaky pastry.

Conclusion:
And there you have it – a delightful journey into crafting your very own delicious Strawberry Danish! This recipe truly shines because it balances the effortless elegance of flaky puff pastry with the bright, sweet burst of fresh strawberries and the creamy richness of a simple cream cheese filling. It’s an impressive dessert or breakfast treat that looks and tastes far more complex than it actually is to make. I promise, the aroma filling your kitchen as these bake is absolutely heavenly!
These Strawberry Danish pastries are wonderfully versatile. Serve them warm from the oven with a dusting of powdered sugar for a classic touch, or accompany them with a dollop of freshly whipped cream or a scoop of vanilla bean ice cream for an extra decadent experience. They are perfect for weekend brunches, afternoon tea, or even as a special treat to brighten any day.
Don’t be afraid to experiment with variations! You could add a hint of lemon zest to the cream cheese filling for a brighter flavor, or even a sprinkle of cinnamon for warmth. Other berries like raspberries or blueberries would also be a fantastic substitute for the strawberries. The possibilities are endless, and I truly encourage you to give this Strawberry Danish recipe a try. You’ll be so proud of the beautiful and delicious results!
Frequently Asked Questions:
Can I use frozen strawberries?
Yes, you can! If using frozen strawberries, be sure to thaw them completely and drain off any excess liquid before mixing them with the sugar and cornstarch. This will prevent your Danish from becoming watery.
How do I store leftover Strawberry Danish?
Store any leftover Strawberry Danish in an airtight container at room temperature for up to two days. For longer storage, you can refrigerate them, though the pastry may lose some of its crispness. Reheating them gently in a low oven can help revive their texture.
Strawberry Danish Recipe
Delicious and flaky strawberry danishes perfect for breakfast or dessert.
Ingredients
-
4 cups sliced strawberries
-
1 tablespoon cornstarch
-
1 tablespoon sugar
-
8 oz. (226 g) cream cheese, room temperature
-
½ cup (60 g) powdered sugar
-
1 teaspoon vanilla extract
-
2 puff pastry sheets, thawed
-
1 large egg (lightly beaten with 1 teaspoon water)
-
2 – 3 tablespoons sugar for topping, optional
-
¼ cup (60 ml) strawberry jam, optional for topping
-
1 cup (120 g) powdered sugar
-
½ teaspoon vanilla extract
-
2 – 3 tablespoons (30 – 45 ml) milk
Instructions
-
Step 1
Preheat oven to 400°F (200°C). Line a baking sheet with parchment paper. -
Step 2
In a medium bowl, combine sliced strawberries with cornstarch and 1 tablespoon sugar. Stir to coat. Let sit for 5 minutes. -
Step 3
In another bowl, beat cream cheese until smooth. Gradually beat in ½ cup powdered sugar and 1 teaspoon vanilla extract until well combined and creamy. -
Step 4
Unfold puff pastry sheets onto a lightly floured surface. Cut each sheet into 4 equal squares. -
Step 5
Spoon about 1 tablespoon of the cream cheese mixture onto the center of each pastry square. Top with a spoonful of the strawberry mixture. Fold two opposite corners of the pastry towards the center, overlapping them slightly to create a Danish shape. -
Step 6
Place the danishes on the prepared baking sheet. Brush the tops with the beaten egg wash. Sprinkle with optional sugar. -
Step 7
Bake for 15-20 minutes, or until golden brown and puffed. Let cool on the baking sheet for a few minutes before transferring to a wire rack. -
Step 8
While danishes are cooling, whisk together 1 cup powdered sugar, ½ teaspoon vanilla extract, and milk until a smooth glaze forms. Drizzle glaze over the cooled danishes. If using, warm strawberry jam slightly and drizzle over the top.
Important Information
Nutrition Facts (Per Serving)
It is important to consider this information as approximate and not to use it as definitive health advice.
Allergy Information
Please check ingredients for potential allergens and consult a health professional if in doubt.