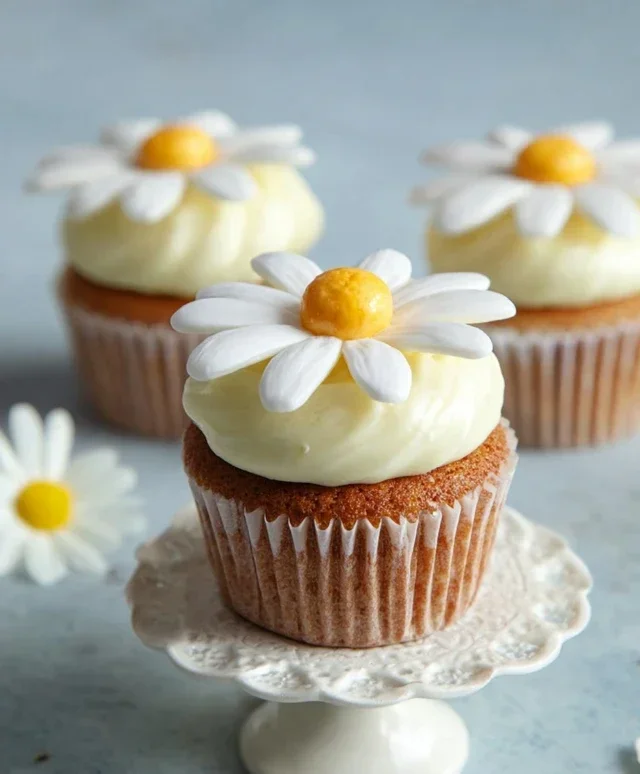
Super Cute Daisy Cupcakes – Easy & Adorable Recipe
Super Cute Daisy Cupcakes are about to bloom in your kitchen, and trust me, they’re as delightful to make as they are to devour! Who doesn’t love a burst of floral sweetness and a pop of sunshine? These adorable treats are perfect for spring parties, birthday celebrations, or just when you need a little extra cheer. What makes these Super Cute Daisy Cupcakes truly special is their effortless charm and vibrant presentation. They’re designed to bring smiles to faces, transforming simple cupcakes into miniature works of edible art. We’ll guide you through creating these whimsical beauties, ensuring your homemade daisy cupcakes are not only incredibly cute but also wonderfully delicious, with a tender crum extractb and a sweet, creamy frosting that perfectly complements the delicate floral design.
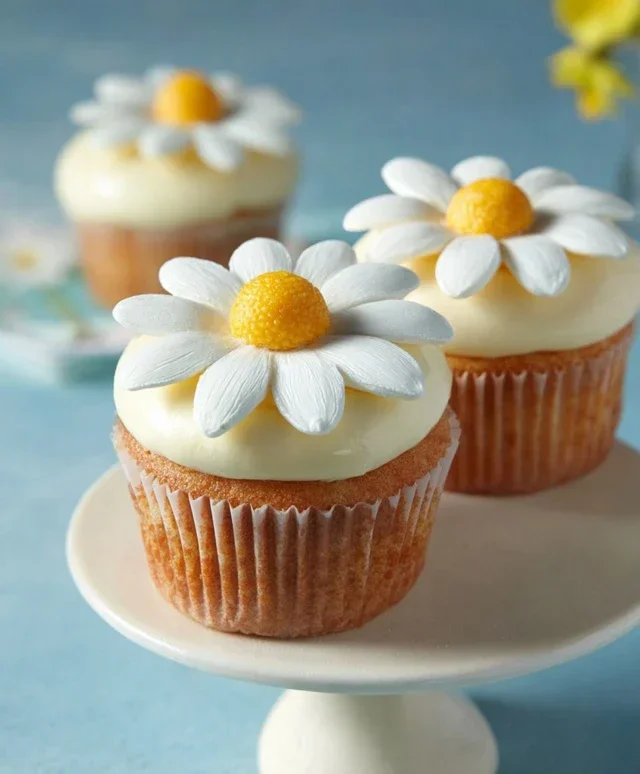
Super Cute Daisy Cupcakes
Get ready to brighten someone’s day with these absolutely adorable Super Cute Daisy Cupcakes! These aren’t just any cupcakes; they’re a burst of sunshine, perfect for birthdays, celebrations, or just when you need a little pick-me-up. The tender, moist cake paired with a creamy, dreamy buttercream frosting, all decorated to look like cheerful daisies, is sure to bring smiles all around. Baking these little delights is a rewarding experience, and the end result is simply irresistible. Let’s get started on creating these edible works of art!
Ingredients:
Making the Daisy Cupcakes
For the Cupcake Batter
We’ll start by creating the base for our delightful cupcakes. The key to a wonderfully moist and tender crum extractb is often the use of buttermilk and the creaming method for our butter and sugar.
1. Preheat and Prepare: First things first, let’s preheat your oven to 180°C (350°F). Line a standard 12-cup muffin tin with colorful cupcake liners. This not only makes them pretty but also ensures easy removal of the baked cupcakes. In a medium bowl, whisk together the all-purpose flour, corn starch, baking powder, baking soda, and salt. This dry mixture will ensure even leavening and a light texture.
2. Creaming the Butter and Sugar: In a large mixing bowl, cream together the 120g of soft unsalted butter and 150g of granulated sugar. You can do this with an electric mixer on medium-high speed, or vigorously by hand with a whisk. Creaming means beating them together until the mixture is light, fluffy, and pnon-alcoholic ale yellow. This process incorporates air, which contributes significantly to the cake’s texture. This usually takes about 3-5 minutes with an electric mixer.
3. Adding Wet Ingredients: Once your butter and sugar mixture is beautifully creamy, beat in the eggs one at a time, ensuring each egg is fully incorporated before adding the next. After the eggs, stir in the 1 tablespoon of vanilla extract. Make sure everything is well combined.
4. Alternating Dry and Wet: Now, we’ll gradually add our dry ingredients to the wet mixture, alternating with the buttermilk. Begin extract by adding about a third of the flour mixture to the butter mixture and mix on low speed (or gently by hand) until just combined. Then, add half of the buttermilk and mix until just incorporated. Repeat this process, adding another third of the flour mixture, then the remaining buttermilk, and finally the last third of the flour mixture. It’s crucial not to overmix here. Overmixing can develop the gluten in the flour too much, resulting in a tough cupcake. Mix only until you no longer see streaks of dry flour.
5. Filling the Liners: Divide the batter evenly among the prepared cupcake liners, filling each about two-thirds full. This allows the cupcakes to rise without overflowing. You can use an ice cream scoop for consistent portioning. Bake for 18-22 minutes, or until a toothpick inserted into the center of a cupcake comes out clean. Let the cupcakes cool in the muffin tin for about 5-10 minutes before transferring them to a wire rack to cool completely. This cooling step is essential before frosting.
For the Cream Cheese Buttercream Frosting
This frosting is incredibly smooth, rich, and has a delightful tang from the cream cheese that perfectly complements the sweet cake.
1. Creaming the Cream Cheese and Butter: In a large bowl, beat the 160g of softened cream cheese and 100g of softened unsalted butter together until light and fluffy. Ensure both the cream cheese and butter are at room temperature (softened for at least an hour) to prevent lumps and achieve a smooth consistency. This is the foundation of our luscious frosting.
2. Adding Icing Sugar and Vanilla: Gradually add the 300g of icing sugar, a cup at a time, beating well after each addition. Scrape down the sides of the bowl as needed. Once all the icing sugar is incorporated, add the 1 teaspoon of vanilla extract and beat until the frosting is light, smooth, and creamy. If the frosting seems too thick, you can add a tiny splash of milk or cream (about a teaspoon at a time) until you reach your desired consistency. If it’s too thin, add a bit more icing sugar.
Decorating Your Daisy Cupcakes
This is where the magic happens and your cupcakes transform into adorable daisies!
1. Coloring the Frosting: Divide your cream cheese frosting into three portions. Leave one portion white for the center of the daisies. Tint one portion with yellow food coloring and the remaining portion with orange food coloring. You want vibrant, cheerful colors for your petals and center.
2. Piping the Daisies: Fit a piping bag with a petal tip (or a star tip if you don’t have a petal tip – it will create a slightly different, but still cute, petal texture). Fill the bag with the yellow or orange frosting. For the center of the daisy, you’ll use the white frosting. You can either use a small round tip or simply snip off the end of a piping bag for a rustic look.
3. Creating the Petals: For each cupcake, pipe a ring of white frosting in the center. Then, pipe the yellow or orange frosting around the white center, creating petals. You can pipe them in a circular motion, pulling away from the center with each petal to create definition. Aim for about 5-7 petals per daisy, depending on the size of your cupcake and desired look.
4. Adding the Centers: Once you’ve piped the petals, you can optionally add a tiny dab of yellow or orange frosting in the very center of the white part of the daisy for an extra touch of detail and dimension, making them look even more realistic and cheerful.
Enjoy these Super Cute Daisy Cupcakes! They are perfect for any occasion and are guaranteed to bring a smile to everyone’s face.
Conclusion:
There you have it – a foolproof guide to creating these absolutely super cute daisy cupcakes that are sure to bring smiles to any occasion! The beauty of this recipe lies in its simplicity and versatility. You don’t need to be a master baker to achieve these delightful decorations, and the result is a visually stunning treat that tastes as good as it looks. Whether you’re whipping these up for a birthday party, a baby shower, a spring gathering, or just to brighten someone’s day, these daisy cupcakes are a guaranteed hit. Imagin extracte them gracing a dessert table, adding a burst of sunshine and charm. They are perfect on their own, but can also be complemented by a scoop of vanilla bean ice cream or a fresh berry salad. Don’t be afraid to experiment with different colored frosting for the centers of your daisies, or even try adding a hint of lemon zest to the cake batter for a delightful citrus twist. I truly encourage you to give this recipe a try; the joy of creating and sharing these sweet little blooms is incredibly rewarding!
Frequently Asked Questions:
Can I use store-bought cake mix?
Absolutely! While I love the homemade touch, using a good quality vanilla or yellow cake mix is a perfectly acceptable shortcut to get these super cute daisy cupcakes made even faster. Just follow the package instructions for baking.
How long will these cupcakes stay fresh?
Once decorated, these cupcakes will stay fresh in an airtight container at room temperature for about 2-3 days. If you live in a very warm climate, you might consider refrigerating them, but be aware that refrigeration can sometimes affect the texture of the frosting.
Can I make the daisy decorations ahead of time?
Yes! You can definitely make your buttercream daisy decorations a day or two in advance. Pipe them onto parchment paper and let them harden completely in the refrigerator. Once firm, they can be carefully peeled off and stored in an airtight container in the fridge until you’re ready to decorate your cooled cupcakes.
Super Cute Daisy Cupcakes
Delightful vanilla cupcakes topped with adorable and delicious cream cheese frosting, decorated to look like daisies. Perfect for any celebration!
Ingredients
-
140 ml Buttermilk
-
120 g Soft unsalted butter
-
150 g Granulated sugar
-
2 Eggs
-
1 tbsp Vanilla extract
-
160 g All purpose flour
-
20 g Corn starch
-
1 tsp Baking powder
-
½ tsp Baking soda
-
1 pinch Salt
-
160 g Cream cheese
-
100 g Soft unsalted butter
-
300 g Icing sugar
-
1 tsp Vanilla extract
-
Yellow food coloring
-
Orange food coloring
Instructions
-
Step 1
Preheat your oven to 175°C (350°F). Line a 12-cup muffin tin with paper liners. -
Step 2
In a large bowl, cream together the 120g soft unsalted butter and 150g granulated sugar until light and fluffy. Beat in the 2 eggs one at a time, then stir in 1 tbsp vanilla extract. -
Step 3
In a separate bowl, whisk together the 160g all-purpose flour, 20g corn starch, 1 tsp baking powder, ½ tsp baking soda, and 1 pinch salt. -
Step 4
Gradually add the dry ingredients to the wet ingredients, alternating with the 140ml buttermilk, beginning and ending with the dry ingredients. Mix until just combined. Do not overmix. -
Step 5
Divide the batter evenly among the prepared muffin cups, filling each about two-thirds full. Bake for 18-20 minutes, or until a toothpick inserted into the center of a cupcake comes out clean. -
Step 6
While the cupcakes cool, prepare the frosting: In a large bowl, beat the 160g cream cheese and 100g soft unsalted butter until smooth. Gradually beat in the 300g icing sugar until well combined and fluffy. Stir in 1 tsp vanilla extract. -
Step 7
Divide the frosting into two bowls. Color one bowl with yellow food coloring and the other with orange food coloring. -
Step 8
Once the cupcakes have cooled completely, pipe or spread the yellow frosting onto the cupcakes. Then, use the orange frosting to pipe small dots in the center of the yellow frosting to create the daisy effect. Chill cupcakes before serving.
Important Information
Nutrition Facts (Per Serving)
It is important to consider this information as approximate and not to use it as definitive health advice.
Allergy Information
Please check ingredients for potential allergens and consult a health professional if in doubt.