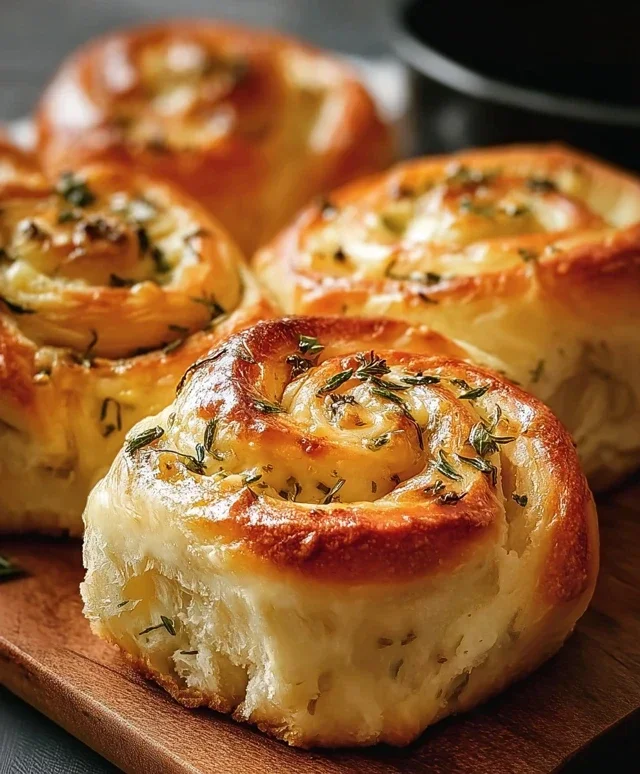
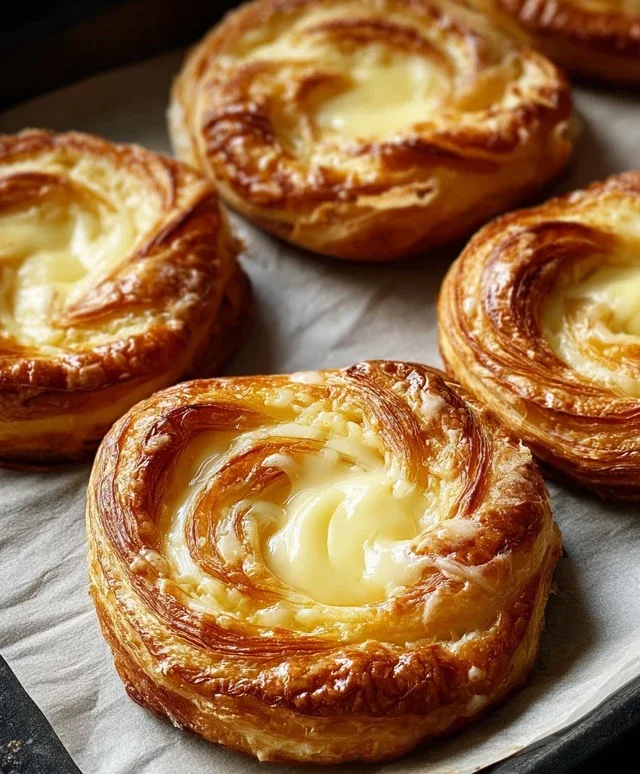
Easy Homemade Cheese Danishes – Flaky Pastry Delight
Cheese Danishes are one of those baked goods that just scream comfort and indulgence. There’s something incredibly satisfying about the flaky, buttery pastry giving way to a sweet, creamy cheese filling. I remember the first time I ever bit into a perfectly made cheese danish – the slight tang of the cream cheese, the delicate sweetness, all enveloped in that golden, crisp shell. It was pure bliss! People adore them for their delightful textural contrast and the rich, yet not overwhelmingly sweet, flavor profile. What truly makes a cheese danish special is the alchemy of simple ingredients transforming into something truly magical. Whether enjoyed with a morning coffee or as an afternoon treat, a well-crafted cheese danish offers a moment of pure, unadulterated joy. Today, we’re diving into how you can recreate this bakery classic in your own kitchen.
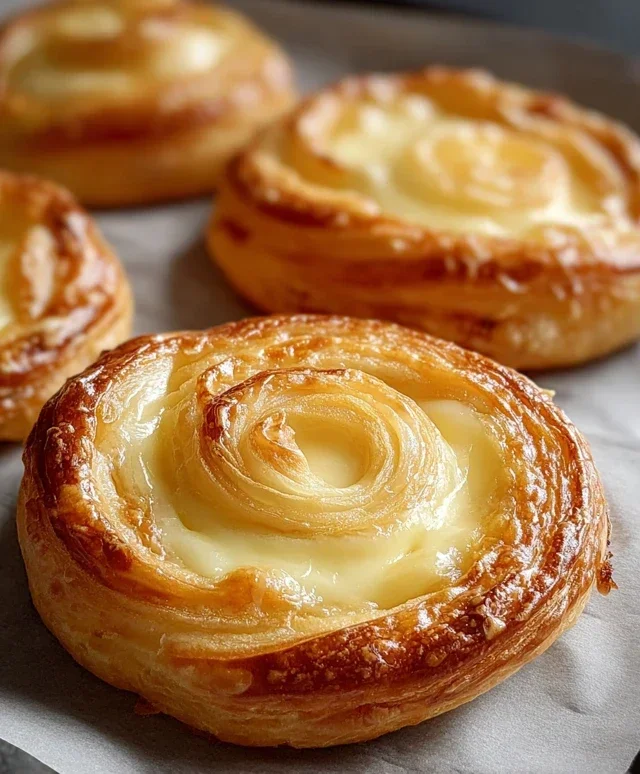
Cheese Danishes
There’s something undeniably comforting and delicious about a warm, flaky cheese danish. That slightly sweet, tangy cream cheese filling encased in buttery, golden pastry is a treat that’s perfect for breakfast, a special brunch, or even an afternoon pick-me-up. While they might seem intimidating, making these delightful pastries at home is surprisingly straightforward, especially when you have a few shortcuts up your sleeve. We’re going to use readily available ingredients and a few clever techniques to bring the bakery-style cheese danish right into your own kitchen. Get ready to impress yourself and anyone lucky enough to share these with you!
Ingredients:
Creating the Cream Cheese Filling
The heart of any great cheese danish is its creamy, slightly sweet filling. The key to a smooth, lump-free filling is to ensure your cream cheese is truly at room temperature. This means taking it out of the refrigerator at least an hour, or even two, before you plan to start mixing. You should be able to easily indent it with your finger. In a medium bowl, combine the softened cream cheese with the granulated white sugar and the first teaspoon of pure vanilla extract. Using a whisk or an electric mixer on low speed, beat these ingredients together until they are thoroughly combined and wonderfully smooth. There should be no visible streaks of cream cheese or sugar. This smooth consistency is crucial for that melt-in-your-mouth texture.
Preparing the Pastry and Assembly
This is where our shortcut really shines! We’re using refrigerated crescent rolls, which are already formed and flaky, saving us a ton of time and effort compared to making puff pastry from scratch. Unroll the two tubes of crescent rolls onto a lightly floured surface. You’ll notice they are pre-perforated into triangles. For a more traditional danish shape and a more robust pastry base, we want to connect these triangles. Gently press the perforated seams together to seal them, essentially creating two larger rectangles of dough. Don’t worry if they aren’t perfectly senon-alcoholic aled; the baking process will take care of that.
Building Your Danishes
Now it’s time to assemble these beauties. Take one of your larger rectangles of dough and carefully spread about half of the cream cheese filling evenly over the surface. Leave a small border (about ½ inch) around the edges of the dough. This border will help prevent the filling from oozing out too much during baking. Sprinkle about half of the brown sugar evenly over the cream cheese layer. Now, for the second danish, repeat this process with the remaining dough rectangle, the rest of the cream cheese filling, and the remaining brown sugar.
Shaping and Baking to Golden Perfection
This is a crucial step for that iconic danish look. We’re going to roll them up from the long edge. Starting with the long side that’s furthest away from you, carefully and tightly roll up the dough, enclosing the filling. As you roll, try to keep the roll as even as possible. Once rolled, you should have a long log. Now, gently slice this log in half horizontally. You’ll end up with two shorter logs. These are going to form the characteristic swirled shape of a danish. Take one of these shorter logs and gently curve it into a circle, bringin extractg the two ends together. You can pinch the ends slightly to help them stick. For the second danish, repeat this curving and joining process.
Place your shaped danishes onto a baking sheet lined with parchment paper. This prevents sticking and makes for easy cleanup. Now, in a small bowl, whisk together the melted butter and the remaining brown sugar. Brush this mixture generously over the top of each danish. This sweet butter mixture not only adds extra flavor but also helps create that beautiful caramelized crust. Bake in a preheated oven at 375°F (190°C) for approximately 15-20 minutes, or until the danishes are puffed up, golden brown, and the filling is bubbly. Keep an eye on them as ovens can vary.
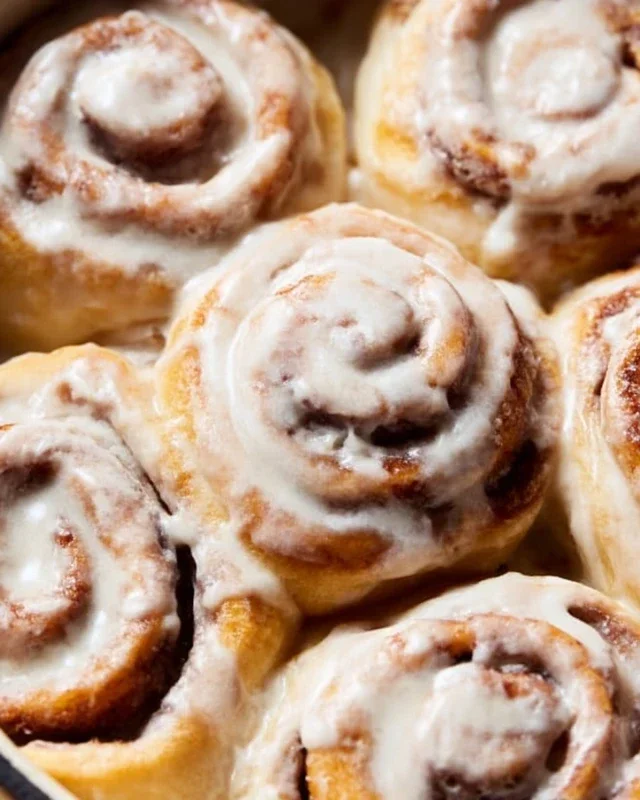
The Finishing Touch: A Sweet Glaze
While your danishes are baking and filling your home with an irresistible aroma, it’s time to prepare the simple yet elegant glaze. In a small bowl, combine the powdered sugar and the second teaspoon of pure vanilla extract. Gradually add the milk, one teaspoon at a time, whisking until you achieve a smooth, drizzle-able consistency. You might need a little more or less milk depending on the humidity and the fineness of your powdered sugar. The glaze should be thick enough to coat the back of a spoon but thin enough to easily drizzle.
Once the danishes are out of the oven and have cooled slightly on the baking sheet for about 5-10 minutes (this allows them to set a little, preventing them from falling apart when you glaze them), transfer them to a wire rack to cool further. Drizzle the prepared glaze generously over the warm danishes. The warmth of the danishes will help the glaze melt slightly and create a beautiful, glossy finish. Allow the glaze to set completely before serving. Enjoy these homemade delights with a cup of coffee or tea!
Conclusion:
There you have it – a step-by-step guide to creating these absolutely delightful Cheese Danishes right in your own kitchen! These pastries are a true testament to how simple ingredients can transform into something truly special. The combination of flaky, buttery puff pastry and a rich, tangy cream cheese filling is simply irresistible, making them perfect for any occasion. Whether you’re looking for a sophisticated brunch centerpiece, a sweet afternoon treat, or a way to impress guests, these cheese danishes will undoubtedly hit the mark. They’re surprisingly straightforward to make, offering a rewarding baking experience with a delicious payoff.
I truly encourage you to give this recipe a try. Don’t be intimidated by the pastry; the store-bought puff pastry does most of the heavy lifting! Once you experience the joy of biting into a warm, freshly baked cheese danish, you’ll be hooked. Feel free to get creative with your toppings – a drizzle of lemon glaze or a sprinkle of fresh berries can add another layer of flavor and visual appeal. Enjoy every single bite!
Frequently Asked Questions:
Can I make the cream cheese filling ahead of time?
Absolutely! You can prepare the cream cheese filling up to 2 days in advance and store it in an airtight container in the refrigerator. This can save you some time on the day of baking and ensure the filling is perfectly chilled for assembly.
What’s the best way to store leftover cheese danishes?
For the best texture, store leftover cheese danishes in an airtight container at room temperature for up to 2 days. If you need to store them for longer, refrigerating them is an option, but the pastry might lose some of its crispness. Reheating them briefly in a warm oven can help revive their delightful flakiness.
Are there any other filling variations I can try?
Certainly! While the classic cream cheese filling is divine, you can experiment with other flavors. Try adding a touch of orange zest to the cream cheese, or incorporating a swirl of fruit jam like raspberry or apricot for a fruity twist. A pinch of cinnamon or nutmeg can also add warmth and complexity to the filling.
Easy Cheese Danishes
Simple and delicious cheese danishes made with crescent rolls and a creamy filling.
Ingredients
-
2 tubes (8 oz each) crescent rolls
-
2 tablespoons salted butter, melted
-
8 tablespoons light brown sugar
-
1 package (8 oz) cream cheese, room temperature
-
¼ cup granulated white sugar
-
1 teaspoon pure vanilla extract
-
½ cup powdered sugar
-
1 teaspoon pure vanilla extract
-
4 teaspoons milk
Instructions
-
Step 1
Preheat oven to 375°F (190°C). Line a baking sheet with parchment paper. -
Step 2
Unroll crescent roll dough and separate into 16 triangles. Press seams together to form a rectangle for each danish. Place on the prepared baking sheet. -
Step 3
In a medium bowl, beat together the cream cheese, granulated white sugar, and 1 teaspoon of vanilla extract until smooth. -
Step 4
Spoon about 1 tablespoon of the cream cheese mixture onto the wider end of each crescent roll triangle. -
Step 5
Fold the sides of the crescent roll dough over the filling, then roll up from the wider end to create a danish shape. Pinch seams to seal. -
Step 6
Brush the tops of the danishes with melted butter and sprinkle evenly with light brown sugar. -
Step 7
Bake for 12-15 minutes, or until golden brown and puffed. -
Step 8
While danishes are baking, whisk together the powdered sugar, remaining 1 teaspoon of vanilla extract, and milk until smooth and drizzly. Add more milk if needed for desired consistency. -
Step 9
Let danishes cool slightly on the baking sheet, then drizzle with the glaze before serving.
Important Information
Nutrition Facts (Per Serving)
It is important to consider this information as approximate and not to use it as definitive health advice.
Allergy Information
Please check ingredients for potential allergens and consult a health professional if in doubt.