Easy Dango Recipe – Delicious Japanese Sweet Dumplings
Easy Dango Recipe! If you’ve ever dreamed of bringin extractg a taste of Japanese street food magic into your own kitchen, then you’re in for a treat. Dango, those delightful chewy rice dumplings, have a way of captivating everyone with their simple yet utterly satisfying charm. They’re not just a dessert; they’re a feeling! Imagin extracte soft, slightly bouncy balls, often skewered and coated in sweet sauces or colorful glazes. What makes them so beloved? It’s their incredible versatility and the pure joy they bring. Whether you’re craving a sweet afternoon snack, a fun treat to share with friends, or a unique element for a themed gathering, this easy dango recipe is your perfect gateway. We’re going to show you just how simple it is to whip up this classic Japanese confection from scratch, making you feel like a culinary artist in no time!
Easy Dango Recipe
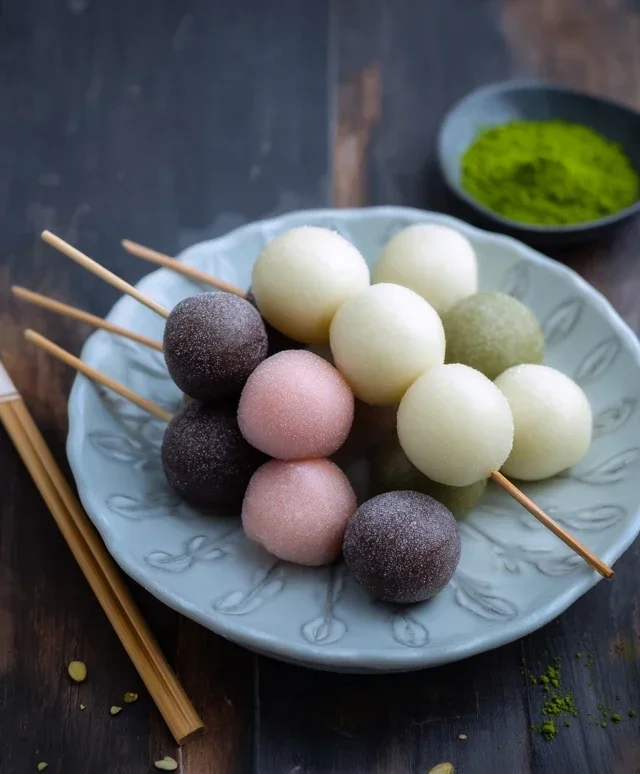
Dango, those delightful chewy rice dumplings, are a staple of Japanese street food and often enjoyed during festivals and tea ceremonies. While they might seem intimidating to make at home, I’m here to tell you that crafting these sweet treats is surprisingly simple! This recipe focuses on ease and adaptability, allowing you to create soft, bouncy dango with minimal fuss. We’ll be making three classic colors and flavors: plain, matcha, and a pretty pink. Get ready to impress yourself and your loved ones with this fun and delicious project.
Ingredients:
Preparing the Dango Dough
The key to perfect dango lies in the right ratio of glutinous and non-glutinous rice flour, and achieving the correct dough consistency. This recipe balances these two types of flour to give you that signature chewy yet soft texture.
Dividing and Coloring the Dough
Now for the fun part – adding color and flavor! This is where you can get creative. We’ll be making three batches: one plain, one matcha, and one pink.
- Divide and Color: Divide the main dango dough into three equal portions.
- Plain Dango: Take one portion and set it aside. This will be your classic white dango.
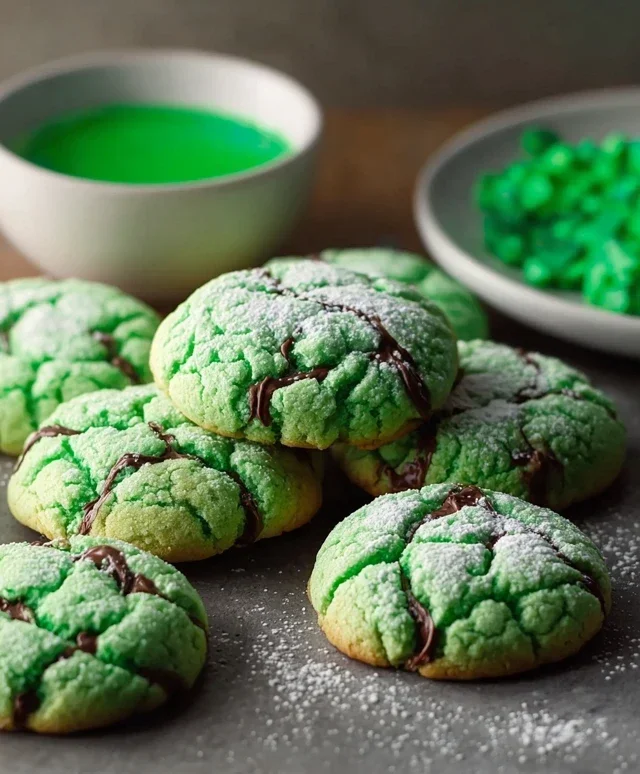
- Matcha Dango: In a small bowl, mix the matcha powder with 1 teaspoon of water to create a smooth paste. This helps to prevent clumps of matcha powder in your dango. Add this matcha paste to the second portion of dango dough. Knead the dough until the color is uniformly green and the matcha is fully incorporated.
- Pink Dango: To the third portion of dango dough, add just one drop of pink food coloring. Knead the dough until the color is evenly distributed. Be careful not to add too much food coloring at once; you can always add more if needed, but it’s hard to take it away.
- Shape the Dango Balls: Take each portion of dough and roll it into small, bite-sized balls, about 1 inch (2.5 cm) in diameter. You can also shape them into small, slightly flattened discs or little teardrop shapes if you prefer. Aim for uniformity in size so they cook evenly. You can place the shaped dango on a lightly floured surface as you work to prevent them from sticking.
- Boil the Dango: Bring a large pot of water to a rolling boil. Carefully drop the dango balls into the boiling water. Don’t overcrowd the pot; cook them in batches if necessary. You’ll know the dango are cooked when they float to the surface. This usually takes about 3-5 minutes. Once they float, let them cook for an additional minute to ensure they are cooked through.
- Chill and Serve: Using a slotted spoon, carefully remove the cooked dango from the boiling water and immediately transfer them to a bowl of ice water. This stops the cooking process and helps them achieve that desirable bouncy texture. Let them cool in the ice water for a few minutes. Once cooled, drain them well.
- Mitarashi Dango: Skewer the cooked dango onto bamboo skewers (usually 3-5 per skewer). Grill them lightly until they have a few char marks, then brush them with a sweet and savory soy sauce glaze (made by simmering soy sauce, sugar, and non-alcoholic mirin).
- Hanami Dango: This is a three-colored dango, often made with white, pink, and green. Skewer them and enjoy them as is, or with a light coating of sweet bean paste (anko).
- With Sweet Bean Paste (Anko): Serve the dango alongside a dollop of sweet red bean paste for a classic pairing.
-
{‘@type’: ‘Ingredient’, ‘name’: ‘Joshinko non-glutinous rice flour’, ‘amount’: {‘value’: 1.33, ‘unit’: ‘cup’}, ‘weight’: {‘value’: 150, ‘unit’: ‘g’}}
-
{‘@type’: ‘Ingredient’, ‘name’: ‘Shiratamako glutinous sweet rice flour’, ‘amount’: {‘value’: 1.5, ‘unit’: ‘cup’}, ‘weight’: {‘value’: 200, ‘unit’: ‘g’}}
-
{‘@type’: ‘Ingredient’, ‘name’: ‘Powdered sugar (optional)’, ‘amount’: {‘value’: 0.75, ‘unit’: ‘cup’}, ‘weight’: {‘value’: 75, ‘unit’: ‘g’}, ‘description’: ‘for added sweetness’}
-
{‘@type’: ‘Ingredient’, ‘name’: ‘Hot water’, ‘amount’: {‘value’: 1.33, ‘unit’: ‘cup’}}
-
{‘@type’: ‘Ingredient’, ‘name’: ‘Matcha powder’, ‘amount’: {‘value’: 1, ‘unit’: ‘teaspoon’}, ‘additionalProperty’: [{‘name’: ‘water’, ‘value’: ‘1 teaspoon’}]}
-
{‘@type’: ‘Ingredient’, ‘name’: ‘Pink food coloring’, ‘amount’: {‘value’: 1, ‘unit’: ‘drop’}}
-
Step 1
In a large bowl, combine Joshinko and Shiratamako flours. If using, whisk in the powdered sugar. -
Step 2
Gradually add hot water to the flour mixture, stirring with chopsticks or a spoon until a shaggy dough forms. Knead by hand until smooth and well combined. -
Step 3
Divide the dough into three portions. Leave one plain, mix one with matcha powder and 1 tsp water, and mix the third with 1 drop of pink food coloring until evenly colored. -
Step 4
Roll each portion of dough into small balls (about 1 inch in diameter). Flatten them slightly. -
Step 5
Bring a pot of water to a boil. Carefully drop the dango balls into the boiling water. Cook until they float to the surface (about 3-5 minutes). -
Step 6
Remove the dango from the boiling water with a slotted spoon and immediately transfer them to a bowl of ice water to cool. Drain well before serving.
Kneading each colored dough well is important to ensure consistent color throughout.
Cooking the Dango
Boiling is the traditional and easiest method for cooking dango. It’s a quick process that transforms the raw dough into perfectly chewy dumplings.
Serving Suggestions
Your delicious homemade dango are now ready to be enjoyed! While they are wonderful on their own, here are a few classic ways to serve them:
This easy dango recipe is a fantastic starting point for exploring Japanese sweets. Feel free to experiment with other natural food colorings and flavorings, like strawberry powder or butterfly pea flower extract, for endless variations. Enjoy the process, and savor every chewy, delightful bite!

Conclusion:
And there you have it! This easy dango recipe is a fantastic way to bring a touch of Japanese sweetness and delightful texture right into your own kitchen. Its simplicity is truly its magic; with just a few basic ingredients and minimal effort, you can create these chewy, pillowy dumplings that are incredibly satisfying. Whether you’re looking for a quick dessert, a fun afternoon treat, or even a delightful addition to a themed party, this recipe is sure to impress without causing any kitchen stress.
We’ve explored how versatile dango can be. Don’t be afraid to get creative! Serve them plain for a pure taste of their delicate flavor, or drizzle them with your favorite sweet sauce. A classic is the sweet soy glaze (mitarashi dango), but honey, maple syrup, or even a fruit coulis works wonderfully. For those who enjoy a bit more fun, consider adding a pinch of matcha powder to the dough for green tea dango, or even a tiny bit of cocoa for chocolate-infused treats. The possibilities are endless, and the joy of making and sharing these is immense. So, I truly encourage you to give this easy dango recipe a try. You might be surprised at how easy and rewarding it is!
Frequently Asked Questions:
What is the best way to store leftover dango?
Leftover dango are best stored in an airtight container at room temperature. They are most enjoyable when eaten fresh, but they will generally keep for a day or two. If they feel a little firm, you can gently warm them up by steaming them for a minute or two, or briefly microwaving them.
Can I make dango ahead of time?
Yes, you can make the dango balls ahead of time. Once they are cooked and cooled, store them in an airtight container. It’s best to add your sauce or toppings just before serving to prevent them from becoming soggy.
What if my dango dough is too sticky?
If your dango dough is too sticky, it likely means you’ve added a little too much liquid. You can gradually add a very small amount of glutinous rice flour, a tablespoon at a time, while kneading until it reaches a workable, slightly sticky consistency that doesn’t cling excessively to your hands. Remember, it should be soft but manageable.
Easy Dango Recipe
A simple and delicious recipe for making soft and chewy dango, a traditional Japanese sweet.
Ingredients
Instructions
Important Information
Nutrition Facts (Per Serving)
It is important to consider this information as approximate and not to use it as definitive health advice.
Allergy Information
Please check ingredients for potential allergens and consult a health professional if in doubt.