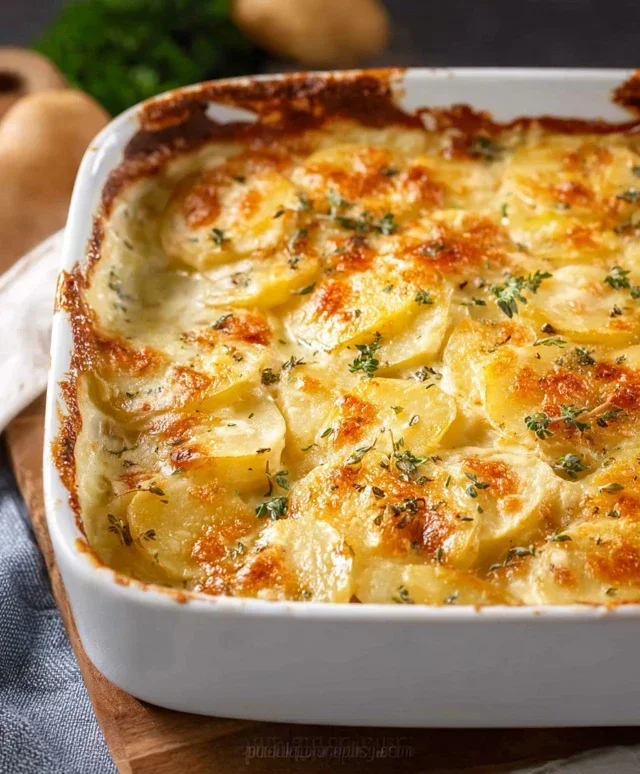
Creamy Scalloped Potatoes – Easy Comfort Food
Scalloped potatoes are a dish that speaks to the soul, a comforting classic that evokes memories of cozy dinners and happy gatherings. There’s something undeniably magical about thinly sliced potatoes, baked until tender and swimming in a rich, creamy sauce, often kissed with cheese and a hint of garlic. It’s no wonder this humble yet magnificent dish holds such a cherished place in our culinary hearts. What makes scalloped potatoes so special? It’s their perfect balance of textures – the soft, yielding potato against the slightly crisp edges, all enveloped in a velvety embrace. Whether served as a side dish to a Sunday roast or as the star of a potluck, this timeless recipe is guaranteed to elicit smiles and second helpings. Prepare to fall in love with this ultimate comfort food all over again.
Why We Adore Them
The Ultimate Comfort Food
Scalloped Potatoes
There’s something incredibly comforting about a bubbling dish of scalloped potatoes. This classic side dish, with its creamy sauce and tender, thinly sliced potatoes, is the epitome of hearty home cooking. It’s the perfect accompaniment to a Sunday roast, a holiday feast, or even just a simple weeknight meal when you’re craving something truly satisfying. Making scalloped potatoes from scratch might seem a little daunting, but I promise you, it’s surprisingly straightforward and the results are so worth the effort. The key is in the layers of thinly sliced potatoes soaking up a rich, flavorful sauce as they bake to tender perfection. Let’s get started on creating this timeless favorite!
Ingredients:
Getting Started: The Foundation of Flavor
The first step in creating these luscious scalloped potatoes is building a flavorful base for our creamy sauce. We’ll start by melting the butter in a large skillet or Dutch oven over medium heat. Once the butter is melted and slightly shimmering, we’ll add our diced yellow onion. We want to sauté the onion until it’s softened and translucent, which usually takes about 5-7 minutes. This process mellows the onion’s sharp bite and releases its natural sweetness, which will contribute wonderfully to the overall flavor of the sauce. Don’t rush this step; patient sautéing makes a big difference! After the onion is softened, we’ll add the minced garlic and cook for just another minute until fragrant. Be careful not to burn the garlic, as it can turn bitter quickly. This aromatic duo forms the savory heart of our sauce.
Creating the Creamy Sauce
With our onions and garlic beautifully softened, it’s time to create the creamy sauce that will envelop our potatoes. We’ll sprinkle the all-purpose flour over the sautéed onion and garlic. This is where we create a roux, which is essential for thickening our sauce. Stir the flour in thoroughly and cook for about 1-2 minutes, stirring constantly. This cooks out the raw flour taste and helps create a smooth, lump-free sauce. Now, gradually whisk in the milk, about half a cup at a time, ensuring each addition is fully incorporated before adding more. Continue whisking until the sauce begin extracts to thicken. Once the milk is incorporated and the sauce is starting to thicken, we’ll add the chicken broth. Whisk everything together until the sauce is smooth and has a consistency that coats the back of a spoon. We’ll also add ¾ teaspoon of the salt and ¼ teaspoon of the black pepper at this stage to season the sauce. Taste and adjust seasoning if needed, remembering we’ll season the potatoes too.
Assembling and Baking the Scalloped Potatoes
Now for the fun part: assembling our masterpiece! Preheat your oven to 375 degrees Fahrenheit (190 degrees Celsius). We’ll need a baking dish, about a 9×13 inch size, or a similar sized oven-safe dish. Lightly grease the dish with butter or cooking spray to prevent sticking. Take your thinly sliced potatoes and, working in layers, arrange them in the prepared baking dish. It’s okay if they overlap a bit. After you’ve arranged the first layer of potatoes, sprinkle them with a little of the remaining salt and pepper – this ensures the potatoes themselves are seasoned. Pour about a third of the creamy sauce evenly over this layer of potatoes. Then, add another layer of potato slices, season again, and pour another third of the sauce over them. Continue this layering process until all the potatoes and sauce are used, finishing with a layer of potatoes topped with the remaining sauce. This layering ensures every potato slice gets coated and cooks evenly.
The Baking Process: Patience is a Virtue
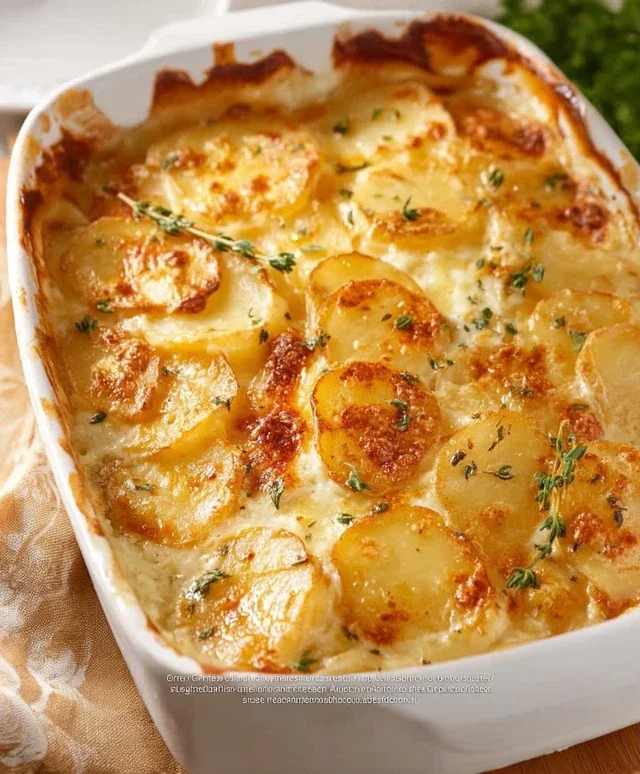
Once our scalloped potatoes are assembled, it’s time for them to bake. Cover the baking dish tightly with aluminum foil. This is important to trap the steam and help the potatoes cook through and become tender without the top browning too quickly. Place the covered dish in your preheated oven and bake for 45 minutes. After 45 minutes, carefully remove the aluminum foil. You’ll see the sauce is bubbling and the potatoes are starting to soften. Continue baking, uncovered, for another 20-30 minutes, or until the potatoes are fork-tender and the sauce is thick and bubbly. The top should be a beautiful golden brown. If you want an extra golden and slightly crispy top, you can always switch the oven to broil for the last minute or two, but watch it very carefully to prevent burning.
Resting and Serving Your Delicious Creation
Allowing the scalloped potatoes to rest for about 10-15 minutes after they come out of the oven is crucial. This might seem like a long time when they smell so good, but it allows the sauce to thicken further and the flavors to meld beautifully. It also prevents the dish from falling apart when you serve it. The potatoes will be incredibly hot, so this resting period also ensures everyone can enjoy them safely. Serve your homemade scalloped potatoes warm, spooning generous portions onto plates. They are absolutely divine on their own, but also pair wonderfully with roasted meats, poultry, or a hearty salad. Enjoy every creamy, comforting bite!
Notes: For the best results, I recommend using Yukon gold or red potatoes. These varieties have a slightly waxy texture that holds their shape well when sliced and baked, preventing them from becoming mushy. Russet potatoes tend to be starchier and can break down too much. Ensure your slices are consistently thin for even cooking. A mandoline slicer can be a great tool for achieving this uniformity, but a sharp knife works perfectly well with a little patience.
Conclusion:
There you have it – the recipe for truly incredible scalloped potatoes! I truly believe this recipe is a winner because it strikes the perfect balance between rich, creamy indulgence and comforting, familiar flavors. The tender potatoes, bathed in a velvety smooth sauce and baked to a golden perfection, make it an absolute showstopper for any occasion. It’s the kind of dish that brings smiles to faces and warms the heart, making it ideal for family dinners, holiday feasts, or even a cozy night in.
This versatile dish pairs beautifully with so many things. I often serve it alongside roasted chicken or beef, but it’s equally delicious with a hearty steak or even as a vegetarian main course with a crisp green salad. For a touch of elegance, consider a sprinkle of fresh chives or parsley just before serving. Don’t be afraid to experiment with variations! Adding a pinch of nutmeg to the sauce can elevate the flavor profile, or you could even incorporate some crispy beef bacon bits for an extra layer of deliciousness. I truly encourage you to give this scalloped potatoes recipe a try; I’m confident you’ll love it as much as I do.
Frequently Asked Questions:
Can I make scalloped potatoes ahead of time?
Yes, you absolutely can! You can prepare the entire dish, cover it tightly with foil, and refrigerate it for up to 2 days. When you’re ready to bake, simply remove it from the refrigerator about 30 minutes before baking and add a few extra minutes to the cooking time until it’s bubbling and heated through.
What’s the difference between scalloped potatoes and au gratin potatoes?
The main difference lies in the addition of cheese. Scalloped potatoes are typically made with a creamy sauce but no cheese, while potatoes au gratin are made with cheese incorporated into the sauce and often sprinkled on top before baking. Both are delicious, but this scalloped potatoes recipe focuses on pure creamy comfort!
Can I use different types of potatoes?
While Russet or Yukon Gold potatoes are generally recommended for their starch content and ability to hold their shape, you can experiment with other waxy or all-purpose potatoes. Just be mindful that very starchy potatoes might break down more during baking.
Scalloped Potatoes
Classic creamy scalloped potatoes, a comforting and easy side dish perfect for any meal.
Ingredients
-
¼ cup salted butter
-
1 large yellow onion (diced)
-
2 cloves garlic (minced)
-
¼ cup all-purpose flour
-
2 cups milk
-
1 cup chicken broth
-
1 ¼ teaspoon salt (divided)
-
½ teaspoon black pepper (divided)
-
3 pounds Yukon gold potatoes (sliced about ⅛-inch thick)
Instructions
-
Step 1
Preheat oven to 375°F (190°C). Grease a 9×13 inch baking dish. -
Step 2
In a large saucepan, melt the butter over medium heat. Add the diced onion and cook until softened, about 5-7 minutes. Stir in the minced garlic and cook for 1 minute more until fragrant. -
Step 3
Whisk in the flour and cook for 1 minute, stirring constantly, to form a roux. -
Step 4
Gradually whisk in the milk and chicken broth until smooth. Bring to a simmer, stirring frequently, until the sauce thickens. -
Step 5
Stir in ¾ teaspoon of salt and ¼ teaspoon of black pepper. Taste and adjust seasoning if needed. -
Step 6
Layer the sliced potatoes in the prepared baking dish. Pour the sauce evenly over the potatoes. -
Step 7
Sprinkle the remaining ½ teaspoon salt and ¼ teaspoon black pepper over the top. -
Step 8
Cover the dish with foil and bake for 40 minutes. Remove the foil and bake for another 20-25 minutes, or until the potatoes are tender and the top is golden brown.
Important Information
Nutrition Facts (Per Serving)
It is important to consider this information as approximate and not to use it as definitive health advice.
Allergy Information
Please check ingredients for potential allergens and consult a health professional if in doubt.