Zesty Raspberry Lemon Cake Recipe- Easy & Delicious
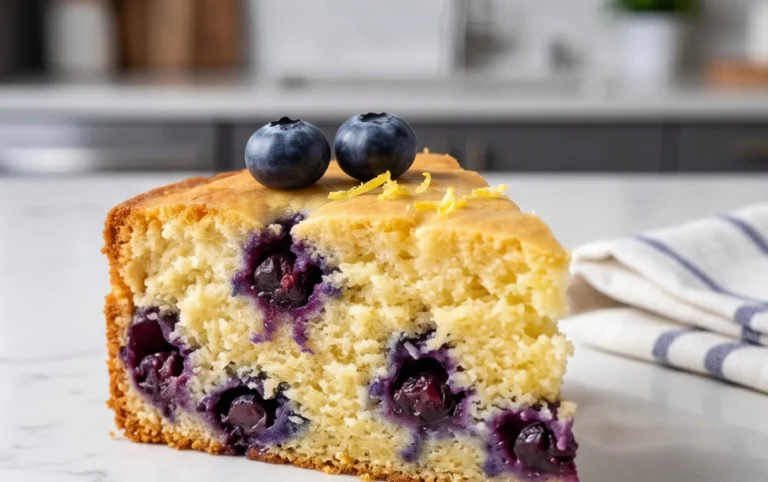
Raspberry Lemon Cake is a symphony of sweet and tart, a delightful dance between vibrant berries and zesty citrus that always brings a smile to my face. There’s something inherently joyful about this particular cake, a reason why it’s a perennial favorite for celebrations, afternoon teas, or simply when you need a little ray of sunshine in your day. Its appeal lies in that perfect balance; the bright tang of fresh lemon cuts through the sweetness of the cake, while bursts of juicy raspberries add delightful pops of flavor and gorgeous color. What truly makes this Raspberry Lemon Cake special is its light, airy texture, kissed with the fragrant aroma of both lemon zest and ripe raspberries. It’s a dessert that feels both elegant and incredibly comforting, a true testament to the magic that happens when simple, fresh ingredients come together.
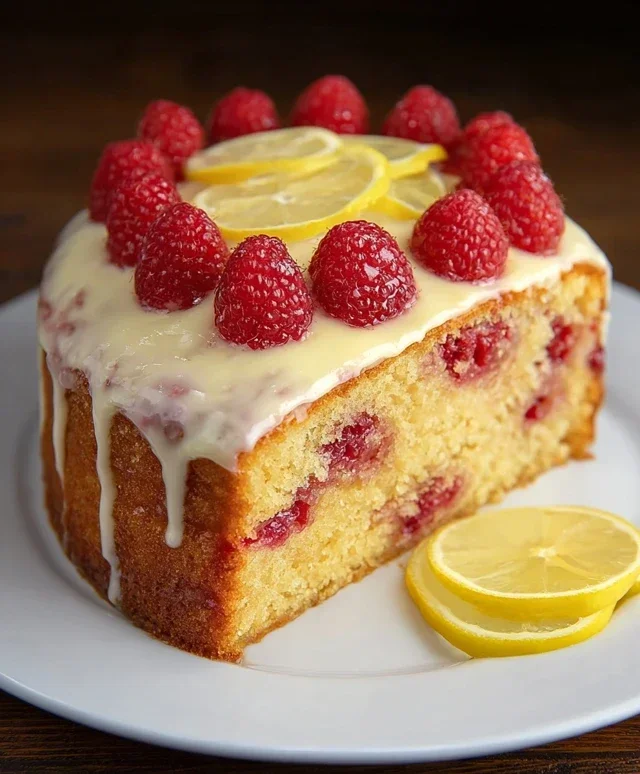
Raspberry Lemon Cake
There’s something undeniably magical about a Raspberry Lemon Cake. The bright, zesty perfume of lemon mingled with the sweet-tart burst of fresh raspberries creates a flavor profile that’s both refreshing and utterly comforting. This cake is a perfect celebration of spring and summer, but honestly, I find myself craving its sunny disposition year-round. What I particularly love about this recipe is how incredibly moist and tender the cake turns out, thanks to the secret ingredient: unsweetened plain yogurt! And for those who prefer a gluten-free option, this recipe uses a fantastic blend that won’t leave you missing a thing. The vibrant pink of the raspberries scattered throughout the golden cake, crowned with a tangy lemon buttercream, makes it a showstopper for any occasion. Get ready to impress yourself and your loved ones with this delightful creation.
Ingredients:
Creating the Cake Batter
The foundation of any great cake lies in its batter, and ours is no exception. We want to ensure every component is perfectly incorporated for a light and airy texture. Begin extract by preheating your oven to 350°F (175°C). Grease and flour two 9-inch round cake pans, or line them with parchment paper. This step is crucial to prevent sticking and ensure your beautiful cakes release cleanly after baking. In a large mixing bowl, whisk together the gluten-free flour, sugar, baking powder, baking soda, and salt. This dry mixture will form the structure of our cake.
In a separate, medium bowl, cream together the softened unsalted butter until it’s light and fluffy. This can be done with an electric mixer or a sturdy whisk. Gradually add the sugar to the butter, continuing to beat until the mixture is pnon-alcoholic ale and creamy. This process, known as creaming, incorporates air into the batter, which contributes to the cake’s tender crum extractb. Next, beat in the eggs one at a time, ensuring each egg is fully incorporated before adding the next. Scrape down the sides of the bowl as needed. Now, it’s time to add the moisture and tang! Stir in the unsweetened plain yogurt, milk, lemon zest, and fresh lemon juice. Mix until just combined. Be careful not to overmix at this stage; we’re just aiming to incorporate these wet ingredients into the buttery, sugary base.
Now, we’ll gradually incorporate the dry ingredients into the wet ingredients. Add about a third of the dry mixture to the wet ingredients and mix on low speed until just combined. Then, add half of the wet ingredients (yogurt, milk, lemon juice, zest mixture) and mix again until just incorporated. Continue alternating, adding another third of the dry ingredients, then the remaining wet ingredients, and finishing with the last third of the dry ingredients. Always mix on low speed and stop as soon as you no longer see streaks of flour. Overmixing at this point can develop the gluten in gluten-free flours too much, leading to a tougher cake. The batter should be smooth and pourable.
Folding in the Raspberries
The vibrant pops of raspberry are what truly elevate this cake. Gently fold the fresh raspberries into the cake batter. You can do this by hand using a spatula or a large spoon. The key here is to be gentle. We want to distribute the raspberries evenly throughout the batter without crushing them too much, which can bleed color into the cake and make it gummy. If you find your raspberries are sticking together, you can lightly toss them in a tablespoon of the gluten-free flour before folding them in; this helps prevent them from sinking to the bottom of the cake during baking. Divide the batter evenly between the two prepared cake pans.
Baking and Cooling Your Masterpiece
Bake the cakes in the preheated oven for 30-35 minutes, or until a wooden skewer or toothpick inserted into the center of the cakes comes out clean. The aroma that fills your kitchen at this point will be heavenly – a perfect blend of sweet citrus and berries. Once baked, allow the cakes to cool in their pans on a wire rack for about 10-15 minutes. This initial cooling period is essential for the cakes to firm up slightly and prevent them from breaking when you try to remove them. After this initial cooling, carefully invert the cakes onto the wire rack to cool completely. Make sure they are completely cool before you even think about frosting them. Frosting a warm cake is a recipe for disaster – it will melt the frosting into a sticky mess!
Whipping Up the Tangy Lemon Buttercream
While your cakes are cooling, let’s prepare the glorious lemon buttercream. This frosting strikes the perfect balance between rich, creamy, and zesty. In a large mixing bowl, beat the softened unsalted butter until it’s incredibly smooth and creamy. This can take a few minutes with an electric mixer. Gradually add the powdered sugar, one cup at a time, mixing on low speed until it’s mostly incorporated before increasing the speed to medium. Be prepared for a little bit of powdered sugar dust to fly, so it’s a good idea to start with your mixer on low. Once all the powdered sugar is incorporated, add the 2 teaspoons of lemon juice. This is where the magic happens, transforming a standard buttercream into a bright and tangy delight. Continue beating the frosting until it’s light, fluffy, and smooth. If the frosting seems too thick, you can add a tiny splash of milk or more lemon juice, a teaspoon at a time, until you reach your desired consistency. Conversely, if it’s too thin, add a little more powdered sugar.
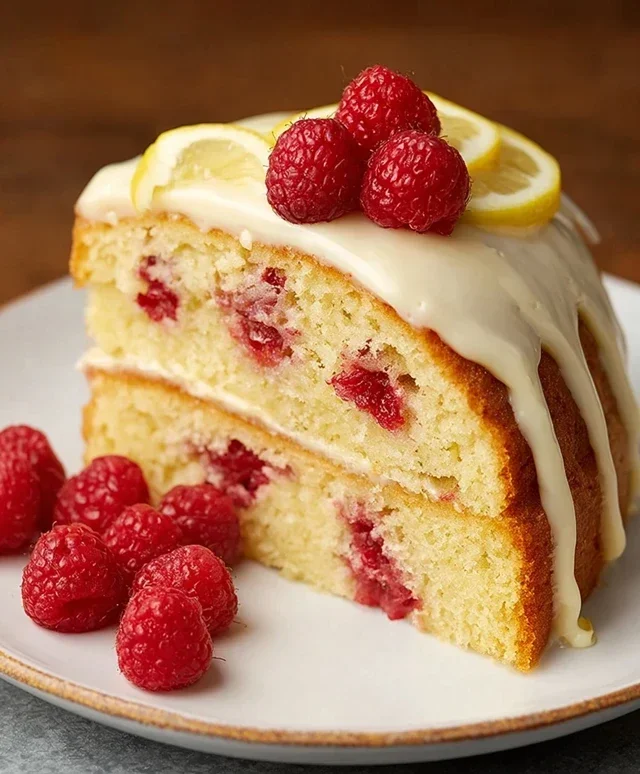
Assembling and Decorating Your Raspberry Lemon Cake
Once your cake layers are completely cool, it’s time for the grand finnon-alcoholic ale: assembly and frosting! Place one cake layer on your serving plate or cake stand. Generously spread a layer of the lemon buttercream over the top. Gently place the second cake layer on top. Now, cover the entire cake with the remaining buttercream. You can create a smooth finish by using an offset spatula, or for a more rustic look, swirl the frosting with the back of a spoon. For an extra touch of elegance and a burst of fresh flavor, you can garnish the top of your cake with a few fresh raspberries and a sprinkle of lemon zest. Allow the cake to sit at room temperature for at least 30 minutes before slicing, or chill it in the refrigerator for about 15-20 minutes if you prefer cleaner slices. Enjoy every delightful bite of this sunshine-filled treat!
Conclusion:
There you have it – a truly delightful Raspberry Lemon Cake that I’m confident you’ll adore. This recipe is a winner because it perfectly balances the bright, zesty tang of lemon with the sweet, slightly tart burst of fresh raspberries. The cake itself is wonderfully moist and tender, creating a luxurious texture that complements the vibrant flavors. It’s the kind of cake that feels both elegant enough for a special occasion and comforting enough for a simple afternoon treat. I can’t wait for you to experience its sunshine-in-a-slice goodness!
For serving, consider a light dusting of powdered sugar, a dollop of fresh whipped cream, or even a simple raspberry coulis to enhance the fruity notes. This cake is also fantastic with a scoop of vanilla bean ice cream. If you’re feeling adventurous, consider adding a touch of finely grated gin extractger to the batter for an extra layer of warmth, or swap some of the raspberries for blueberries for a different berry medley. Don’t hesitate to experiment and make it your own!
I truly encourage you to give this Raspberry Lemon Cake a try. It’s simpler than it looks and the reward of that first delicious bite is absolutely worth it. Happy baking!
Frequently Asked Questions:
Can I use frozen raspberries instead of fresh?
Absolutely! If using frozen raspberries, it’s best to toss them in a tablespoon of flour before adding them to the batter. This helps prevent them from sinking to the bottom of the cake. You might also notice they release a bit more liquid, so the baking time could be slightly longer.
How long will this cake keep?
This Raspberry Lemon Cake will stay fresh at room temperature, loosely covered, for about 2-3 days. For longer storage, you can keep it in an airtight container in the refrigerator for up to a week. It’s also lovely served slightly chilled!
Raspberry Lemon Cake
A bright and zesty gluten-free cake bursting with fresh raspberries and a tangy lemon frosting.
Ingredients
-
3 cups gluten-free flour
-
1 ½ cups sugar
-
1 cup unsalted butter, room temperature
-
1 cup unsweetened plain yogurt
-
¼ cup milk
-
1 tbsp baking powder
-
¾ tsp baking soda
-
½ tsp salt
-
3 eggs
-
3 tbsp lemon zest
-
⅓ cup lemon juice
-
2 cups fresh raspberries
-
2 cups unsalted butter, room temperature
-
5 cups powdered sugar
-
2 tsp lemon juice
Instructions
-
Step 1
Preheat oven to 350°F (175°C). Grease and flour a 9-inch cake pan. -
Step 2
In a large bowl, cream together 1 cup of softened butter and 1 ½ cups sugar until light and fluffy. -
Step 3
Beat in the eggs one at a time, then stir in the yogurt, ¼ cup milk, 3 tbsp lemon zest, and ⅓ cup lemon juice. -
Step 4
In a separate bowl, whisk together the gluten-free flour, baking powder, baking soda, and salt. Gradually add the dry ingredients to the wet ingredients, mixing until just combined. -
Step 5
Gently fold in the fresh raspberries. Pour the batter into the prepared cake pan. -
Step 6
Bake for 30-35 minutes, or until a toothpick inserted into the center comes out clean. -
Step 7
Let the cake cool in the pan for 10 minutes before inverting it onto a wire rack to cool completely. -
Step 8
For the frosting, beat 2 cups of softened butter until smooth. Gradually add the powdered sugar and 2 tsp lemon juice, mixing until creamy and well combined. -
Step 9
Frost the cooled cake with the lemon frosting.
Important Information
Nutrition Facts (Per Serving)
It is important to consider this information as approximate and not to use it as definitive health advice.
Allergy Information
Please check ingredients for potential allergens and consult a health professional if in doubt.