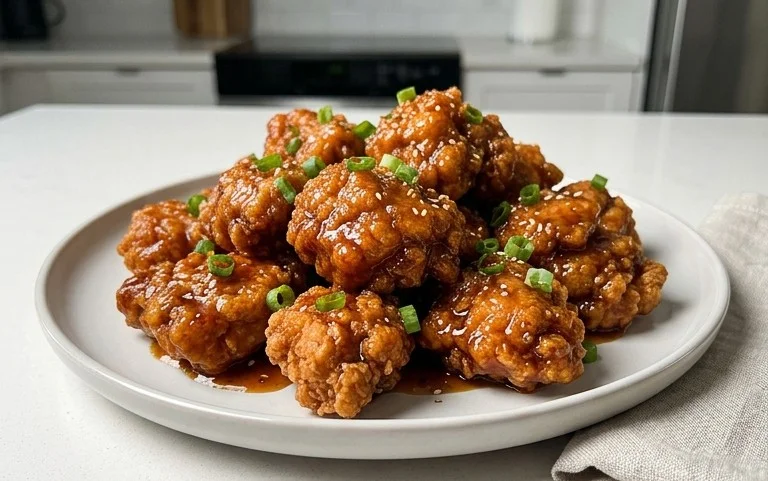
Cherry Dr Pepper Grilled Chicken-Sweet Smoky Flavor
Cherry Dr. Pepper Grilled Chicken is about to become your new backyard barbecue obsession. Forget boring marinades; this recipe takes a beloved soda and transforms it into a flavor explosion that will have your taste buds singin extractg. There’s something incredibly satisfying about the sweet, tangy, and slightly spicy profile that develops as the Cherry Dr. Pepper caramelizes on the grill. It’s that unique blend of sweet cherry and classic Dr. Pepper spice that makes this dish so incredibly craveable. Whether you’re a seasoned grill master or just looking for an easy yet impressive weeknight meal, this Cherry Dr. Pepper Grilled Chicken is guaranteed to impress. Get ready for juicy, tender chicken with an unforgettable glaze that’s perfect for summer gatherings or any time you want a taste of something truly special.
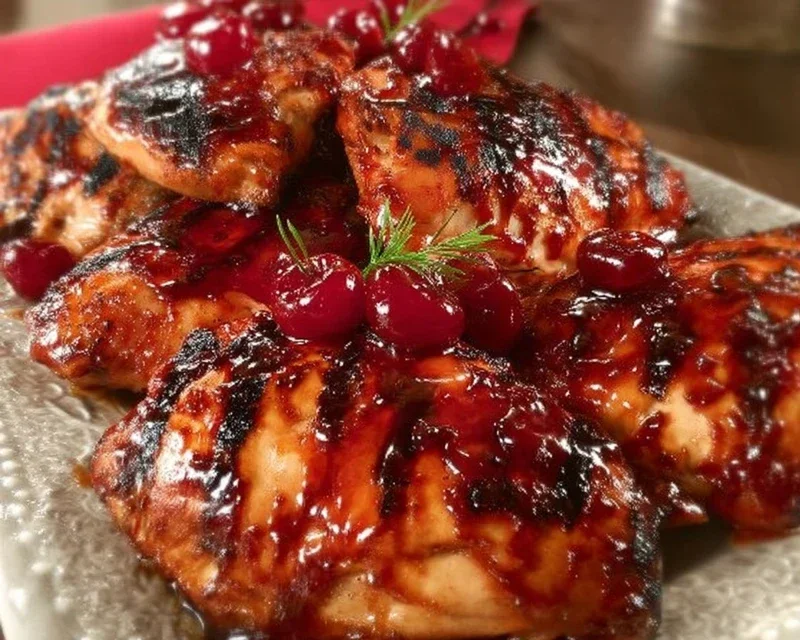
Cherry Dr. Pepper Grilled Chicken
Get ready to fire up the grill and tantalize your taste buds with this incredibly flavorful Cherry Dr. Pepper Grilled Chicken. This recipe is a guaranteed crowd-pleaser, boasting a perfect balance of sweet, tangy, and savory notes that will have everyone asking for seconds. The secret? A surprisingly simple yet utterly delicious marinade and glaze that transforms ordinary chicken into something truly special. Whether you’re hosting a backyard barbecue or just looking for a delicious weeknight meal, this grilled chicken is the answer.
Ingredients:
Marinade and Glaze Preparation
The magic behind this Cherry Dr. Pepper Grilled Chicken lies in its rich and dynamic marinade, which doubles as a fantastic glaze. To begin extract, grab a medium-sized saucepan and combine all of the sauce ingredients: the Cherry Dr. Pepper, ketchup, tomato paste, brown sugar, Worcestershire sauce, onion powder, black pepper, liquid smoke, chili powder, and minced garlic. Give everything a good whisk until it’s well combined. Now, we need to let those flavors meld and thicken slightly. Place the saucepan over medium heat on your stovetop. Stir the mixture frequently to prevent sticking, and bring it to a gentle simmer. Let it simmer for about 10-15 minutes, or until the sauce has thickened to a consistency that coats the back of a spoon. This simmering process is crucial; it allows the flavors to concentrate and the sugar to caramelize a bit, creating that irresistible depth of flavor we’re aiming for. Once it’s reached the desired thickness, remove the saucepan from the heat and let it cool slightly. This marinade will be used to both flavor and tenderize the chicken, as well as brushed onto the chicken during grilling to create that beautiful, caramelized exterior.
Chicken Preparation and Marinating
While the sauce is cooling, it’s time to prepare your chicken. If you’re using a whole chicken cut into pieces, ensure each piece is thoroughly rinsed and patted dry with paper towels. If you have a package of dark meat chicken, such as thighs or drum extractsticks, give them the same treatment. In a large bowl or a resealable plastic bag, place your chicken pieces. Season them generously all over with the seasoning salt and paprika. Make sure to get into all the nooks and crannies for an even distribution of flavor. Now, pour about half of the cooled Cherry Dr. Pepper marinade over the chicken. Gently toss the chicken pieces to ensure they are all coated in the marinade. Seal the bowl or bag and refrigerate for at least 2 hours, or ideally, overnight. The longer the chicken marinates, the more flavorful and tender it will become. This marinating process allows the sugars and acids in the Dr. Pepper and ketchup to break down the chicken fibers, resulting in incredibly juicy and succulent grilled chicken.
Grilling the Chicken
Preheat your grill to medium-high heat. This is important for getting a nice sear on the chicken while ensuring it cooks through evenly. While the grill is preheating, remove the chicken from the marinade, allowing any excess to drip off. Discard the remaining marinade from the bowl or bag, as it has been in contact with raw chicken. Place the seasoned chicken pieces directly onto the preheated grill grates.
Grilling Phase One: Initial Searing and Cooking
Begin extract by grilling the chicken skin-side down first, if applicable, for about 5-7 minutes. This allows the skin to crisp up and render some of its fat. You should start to see some nice grill marks developing. After the initial sear, flip the chicken pieces. Now, it’s time to start applying the glaze. Using a basting brush, generously brush the top of each chicken piece with the reserved Cherry Dr. Pepper glaze. Close the grill lid and continue to cook for another 7-10 minutes. The lid helps to create an oven-like environment, ensuring the chicken cooks through while the glaze caramelizes beautifully.
Grilling Phase Two: Glazing and Finishing
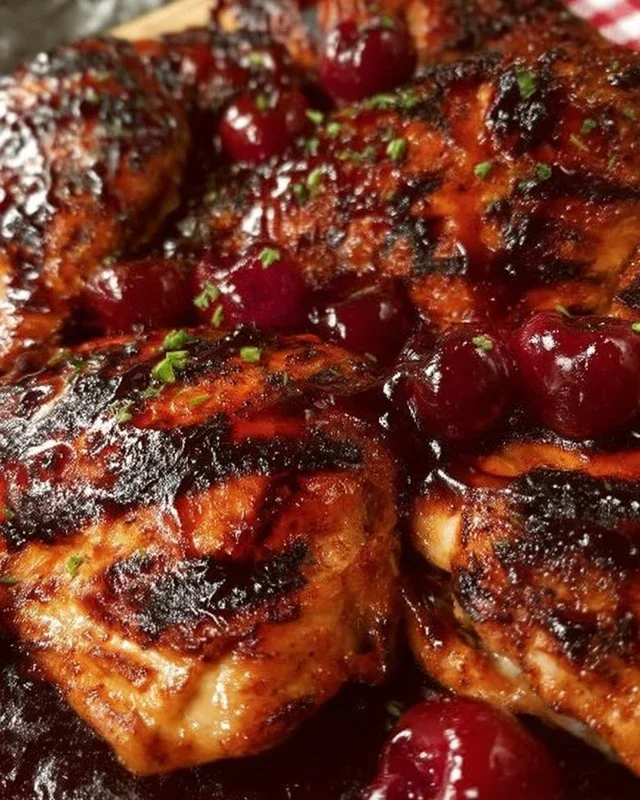
Continue to flip the chicken pieces every 7-10 minutes, basting with the glaze each time you flip. This repeated glazing is key to developing that sticky, sweet, and savory crust. The sugar in the glaze will start to caramelize, so keep an eye on it to prevent burning. If you notice any spots charring too quickly, you can move the chicken to a cooler part of the grill. The total grilling time will vary depending on the size and thickness of your chicken pieces, but generally, aim for about 30-40 minutes for boneless pieces or up to 45-55 minutes for bone-in pieces. You’ll know the chicken is done when the internal temperature reaches 165 degrees Fahrenheit (74 degrees Celsius) in the thickest part of the meat, and the juices run clear. Don’t be afraid to use a meat thermometer to ensure perfect doneness. The glaze should be bubbly and slightly sticky, with a beautiful deep reddish-brown color.
Once your Cherry Dr. Pepper Grilled Chicken is cooked to perfection, remove it from the grill and let it rest for about 5-10 minutes before serving. This resting period allows the juices to redistribute throughout the meat, ensuring every bite is incredibly moist and flavorful. Serve this amazing grilled chicken with your favorite sides like coleslaw, potato salad, or corn on the cob for a complete and unforgettable meal. Enjoy the delightful taste of your homemade Cherry Dr. Pepper Grilled Chicken!
Conclusion:
And there you have it! This Cherry Dr. Pepper Grilled Chicken recipe is truly a game-changer for your next barbecue or weeknight dinner. The magical combination of sweet cherry, tangy Dr. Pepper, and savory chicken creates a flavor profile that’s both unique and incredibly satisfying. It’s remarkably simple to prepare, making it accessible even for begin extractner grill masters, and the results are consistently impressive. The sweet and sticky glaze caramelizes beautifully on the grill, infusing every bite with deliciousness. I know you’ll love it!
For serving, I highly recommend pairing this vibrant chicken with classic summer sides. Think creamy coleslaw, grilled corn on the cob, a fresh potato salad, or even some simple grilled asparagus. The sweetness of the chicken complements these dishes perfectly. If you’re feeling adventurous, consider a sprinkle of sesame seeds or chopped cilantro just before serving for an extra pop of flavor and texture. Don’t be afraid to experiment with this Cherry Dr. Pepper Grilled Chicken!
Give it a try – I’m confident it will become a new family favorite. The ease of preparation and the incredible flavor make it a winner every time. So fire up that grill and get ready to impress!
Frequently Asked Questions:
Can I make this recipe indoors?
Absolutely! While grilling offers a unique smoky flavor and char, you can adapt this recipe for indoor cooking. You can pan-sear the chicken in a hot skillet or bake it in the oven. For pan-searing, cook the chicken until almost done, then brush with the glaze and finish under the broiler to caramelize. If baking, place the chicken in a baking dish, brush with the glaze, and bake at around 375°F (190°C) until cooked through, basting with the glaze a few times towards the end.
What if I don’t have Dr. Pepper?
While Dr. Pepper provides a distinct flavor, you can achieve similar results with other cola-based sodas. A regular Coca-Cola or even a root non-alcoholic beer could work as a substitute, though the flavor profile will be slightly different. The key is the carbonation and the blend of spices in the soda, which help tenderize the chicken and contribute to the glaze’s sweetness and complexity.
Cherry Dr. Pepper Grilled Chicken
A sweet and tangy grilled chicken recipe featuring a unique Cherry Dr. Pepper glaze.
Ingredients
-
1- 12 oz can Cherry Dr. Pepper
-
1 Cup Ketchup
-
1 – 6 oz. can tomato paste
-
1 Cup Brown Sugar
-
1 Tablespoon Worcestershire sauce
-
1/2 tsp. Onion Powder
-
1/2 tsp. black pepper
-
1/2 tsp. liquid smoke
-
1/2 tsp. Chili Powder
-
1 tsp. minced garlic
-
1 whole chicken cut up OR 1 package of dark meat chicken cut up about 12 pieces of chicken
-
3 teaspoons Seasoning Salt
-
1 tsp Paprika
Instructions
-
Step 1
In a saucepan, combine Cherry Dr. Pepper, ketchup, tomato paste, brown sugar, Worcestershire sauce, onion powder, black pepper, liquid smoke, chili powder, minced garlic, seasoning salt, and paprika. -
Step 2
Bring the mixture to a boil over medium heat, then reduce heat and simmer for 15-20 minutes, stirring occasionally, until thickened into a glaze. -
Step 3
Season the chicken pieces generously with additional seasoning salt and black pepper. -
Step 4
Preheat your grill to medium-high heat. Lightly oil the grill grates. -
Step 5
Grill the chicken for 20-25 minutes, turning every 5-7 minutes, brushing with the Cherry Dr. Pepper glaze during the last 10 minutes of cooking. -
Step 6
Ensure chicken is cooked through to an internal temperature of 165°F (74°C).
Important Information
Nutrition Facts (Per Serving)
It is important to consider this information as approximate and not to use it as definitive health advice.
Allergy Information
Please check ingredients for potential allergens and consult a health professional if in doubt.