Crispy Country Fried Chicken Recipe – Southern Comfort
Country fried chicken is more than just a meal; it’s a warm hug from Grandma’s kitchen, a nostalgic trip back to simpler times. There’s something utterly comforting and undeniably delicious about that perfect combination of crispy, golden-brown exterior giving way to juicy, tender chicken within. We all have our favorite memories associated with this iconic dish, whether it was a Sunday dinner centerpiece or a treat from a roadside diner. What makes true country fried chicken so special? It’s the careful balance of seasoned flour, the hot oil that crackles and crisps the coating to perfection, and the love that goes into every piece. Today, I’m going to share with you a recipe that captures the heart and soul of authentic country fried chicken, guaranteed to bring smiles and satisfied sighs to your table.
Country Fried Chicken
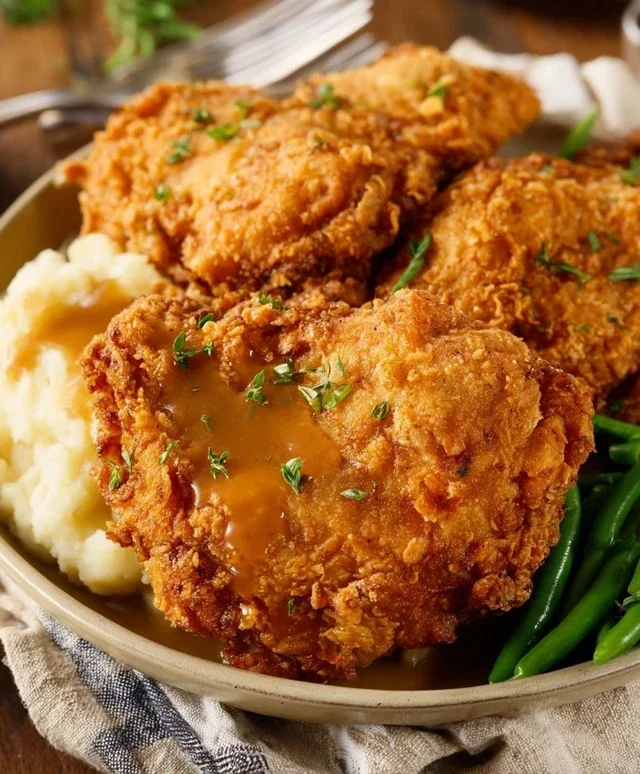
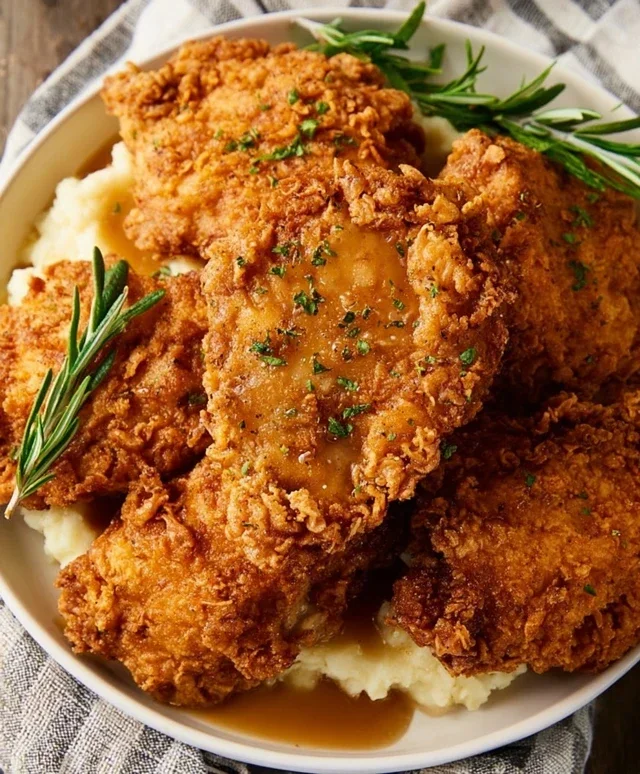
There’s something incredibly comforting about a plate piled high with perfectly golden-brown, crispy country fried chicken. It’s a dish that evokes Sunday dinners, family gatherings, and the simple joy of a home-cooked meal. Forget those dry, bland versions you might have tried. My recipe focuses on achieving that irresistible crunch on the outside while keeping the chicken incredibly juicy and tender on the inside. This isn’t about fancy techniques; it’s about straightforward, honest cooking that delivers delicious results every time.
Ingredients:
Getting Started: Preparing the Chicken
The first step to achieving perfectly fried chicken is to prepare the chicken breasts. I like to cut each chicken breast in half horizontally to create thinner cutlets. This ensures that the chicken cooks through evenly and quickly, preventing the outside from burning before the inside is done. You can also pound them gently with a meat mallet between sheets of plastic wrap to an even thickness, about ½ inch. This also helps with even cooking. Once prepared, it’s time for the crucial brining process – the buttermilk soak. Place the chicken pieces in a shallow dish or a large resealable bag. Pour the 2 cups of buttermilk over the chicken, making sure each piece is fully submerged. The buttermilk is key to tenderizing the chicken and giving the flour coating something to adhere to. Season the buttermilk with 1 teaspoon of the salt. Let the chicken marinate in the refrigerator for at least 30 minutes, but for even better results, I recommend a few hours, or even overnight. The longer it marinates, the more tender and flavorful your chicken will become.
The Crispy Coating
While the chicken is getting tender in its buttermilk bath, it’s time to assemble the dry dredgin extractg mixture that will give our chicken its signature crunch. In a shallow dish or a pie plate, combine the 1 ½ cups of all-purpose flour, ½ cup of breadcrum extractbs, 2 ½ teaspoons of seasoned salt, ¾ teaspoon of paprika, ½ teaspoon of cayenne pepper, and 1 ½ teaspoons of black pepper. Add the remaining 2 teaspoons of salt to this dry mixture. Whisk everything together thoroughly to ensure the seasonings are evenly distributed throughout the flour. This well-seasoned coating is what transforms plain chicken into a flavor-packed, crispy delight. Having your dry ingredients ready to go makes the breading process much smoother and quicker once the chicken is out of the buttermilk.
The Frying Process
Now for the exciting part – frying! In a large, heavy-bottomed skillet or a Dutch oven, add the 1 ½ cups of vegetable oil. Heat the oil over medium-high heat until it reaches about 350°F (175°C). You can test the oil temperature by dropping a tiny bit of the flour mixture into it; if it sizzles immediately and floats to the surface, the oil is ready. It’s important to have enough oil to come about halfway up the sides of the chicken pieces so they can fry properly.
Once the oil is hot, remove one piece of chicken from the buttermilk, letting any excess drip off briefly. Then, dredge it thoroughly in the seasoned flour mixture, pressing down gently to ensure it’s completely coated on all sides. Shake off any excess flour. This is where the magic happens. Carefully place the coated chicken piece into the hot oil. Don’t overcrowd the pan; fry the chicken in batches, usually 2-3 pieces at a time, depending on the size of your skillet. Overcrowding the pan will lower the oil temperature, resulting in greasy, soggy chicken instead of beautifully crisp pieces.
Achieving Golden Perfection
Fry the chicken for about 6-8 minutes per side, or until it’s deeply golden brown and the internal temperature reaches 165°F (74°C) when measured with a meat thermometer. The exact cooking time will depend on the thickness of your chicken pieces. Resist the urge to move the chicken around too much in the first few minutes of frying, as this can dislodge the coating. Once a beautiful golden-brown crust has formed on one side, carefully flip the chicken using tongs and fry the other side until equally golden and cooked through.
As each batch of chicken is done, remove it from the skillet and place it on a wire rack set over a baking sheet. This allows any excess oil to drain off, ensuring maximum crispiness. You can also pop the drained chicken into a warm oven (around 200°F/95°C) while you fry the remaining batches to keep it warm and continue crisping. This simple step makes all the difference in achieving that restaurant-quality crunch. Serve your country fried chicken hot with your favorite sides, like mashed potatoes, gravy, or a fresh salad, and enjoy the fruits of your labor!
Conclusion:
There you have it – my tried-and-true recipe for achieving that perfect, crispy, golden-brown country fried chicken! This isn’t just any fried chicken; it’s a symphony of textures and flavors, where the juicy, tender meat is encased in a crunchy, seasoned coating that will have everyone asking for seconds. The beauty of this recipe lies in its simplicity, yielding a dish that’s both comforting and undeniably impressive. Whether you’re hosting a family gathering or simply craving a taste of home-style cooking, this country fried chicken is sure to be a hit.
For a truly classic experience, I love serving this alongside creamy mashed potatoes and a generous helping of homemade gravy. A side of collard greens or a fresh coleslaw adds a welcome balance to the richness. Don’t be afraid to get creative with your serving suggestions! You can also transform this into a fantastic sandwich by piling the crispy pieces onto toasted buns with your favorite toppings.
If you’re feeling adventurous, consider a few variations. For a touch of heat, add a pinch of cayenne pepper to your flour dredge. You can also experiment with different herbs and spices, like smoked paprika or garlic powder, to tailor the flavor profile to your liking. The possibilities are endless! I truly encourage you to give this country fried chicken recipe a try; the satisfaction of biting into that perfect piece is truly unmatched.
Frequently Asked Questions:
Why is my country fried chicken not crispy enough?
Ensuring a crispy coating often comes down to a few key factors. Make sure your oil is hot enough – around 350°F (175°C) is ideal. If the oil is too cool, the chicken will absorb too much oil and become soggy. Also, avoid overcrowding the pan; fry in batches to maintain the oil temperature. Ensure your dredge is well-seasoned and that the chicken is thoroughly coated. Finally, letting the coated chicken rest for a few minutes before frying can help the coating adhere better.
Can I make the breading ahead of time?
While you can mix your dry dredge ingredients ahead of time and store them in an airtight container, I don’t recommend breading the chicken too far in advance. The moisture from the chicken can start to soften the coating, reducing its crispiness. It’s best to dredge and fry the chicken relatively soon after preparation for the best results.
Country Fried Chicken
Crispy and flavorful country-style fried chicken, a Southern classic.
Ingredients
-
4 boneless skinless chicken breasts
-
1 ½ cups vegetable oil
-
2 cups buttermilk
-
2 large eggs (whisked)
-
3 teaspoons salt
-
1 ½ cup all-purpose flour
-
½ cup breadcrumbs
-
2 ½ teaspoons seasoned salt
-
¾ teaspoon paprika
-
½ teaspoon cayenne pepper
-
1 ½ teaspoon black pepper
Instructions
-
Step 1
Cut chicken breasts into 2-3 pieces each. In a shallow dish, combine buttermilk and eggs. Submerge chicken in the mixture and let marinate for at least 30 minutes or up to 4 hours in the refrigerator. -
Step 2
In another shallow dish, whisk together flour, salt, seasoned salt, paprika, cayenne pepper, and black pepper. -
Step 3
Heat vegetable oil in a large, heavy-bottomed skillet or Dutch oven over medium-high heat until it reaches about 350°F (175°C). -
Step 4
Remove chicken pieces from the buttermilk mixture, letting excess drip off. Dredge each piece thoroughly in the flour mixture, ensuring it is well coated. Shake off any excess flour. -
Step 5
Carefully place coated chicken pieces into the hot oil, being careful not to overcrowd the pan. Fry in batches for about 6-8 minutes per side, or until golden brown and cooked through (internal temperature of 165°F or 74°C). -
Step 6
Remove fried chicken from the skillet and place on a wire rack set over a baking sheet to drain any excess oil. Let rest for a few minutes before serving.
Important Information
Nutrition Facts (Per Serving)
It is important to consider this information as approximate and not to use it as definitive health advice.
Allergy Information
Please check ingredients for potential allergens and consult a health professional if in doubt.