Best Mongolian Beef Recipe- Quick & Flavorful
Mongolian Beef: the name itself conjures images of a rich, savory, and slightly sweet stir-fry that has captured the hearts (and stomachs!) of many. Have you ever found yourself craving that irresistible combination of tender beef, crisp vegetables, and a glossy, umami-packed sauce? You’re not alone! There’s a reason why Mongolian Beef consistently ranks as a favorite on takeout menus and at family dinners. Its appeal lies in its perfect balance: the subtle sweetness from sugar or honey plays beautifully against the deep savory notes of soy sauce and the ever-so-slight tang. What truly makes Mongolian Beef special is its ability to be both comforting and exciting, a dish that feels both familiar and wonderfully exotic. It’s the kind of meal that makes you want to lick your plate clean, a testament to its truly craveable flavor profile.
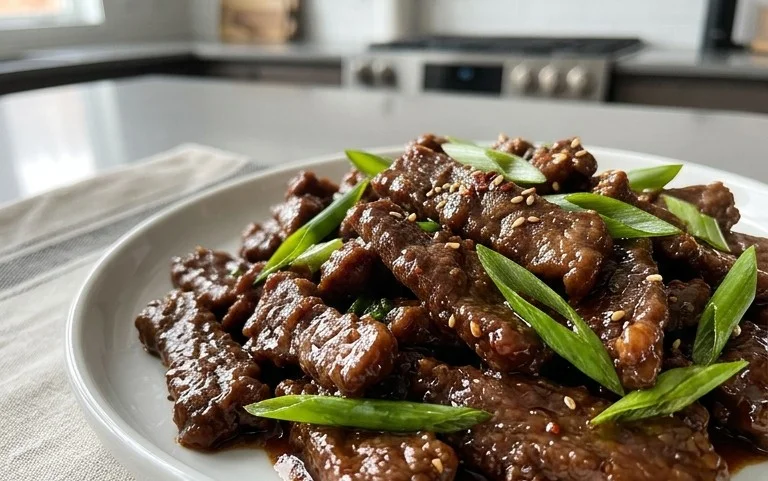
Mongolian Beef
Mongolian Beef is a classic Chinese-American stir-fry that’s known for its deeply savory and slightly sweet sauce clingin extractg to tender strips of beef. It’s a dish that conjures images of bustling takeout restaurants and the comforting aroma of soy sauce and garlic. While it might seem intimidating to recreate at home, I promise you, with a few simple steps and the right ingredients, you can achieve that restaurant-quality flavor and texture right in your own kitchen. The key lies in properly marinating the beef to ensure it’s incredibly tender and then creating a balanced sauce that perfectly complements the richness of the meat. Let’s get cooking!
Ingredients:
Marinating the Beef for Ultimate Tenderness
The first and arguably most crucial step in achieving tender Mongolian Beef is the marination. This process not only adds flavor but also helps to break down the beef fibers, ensuring a melt-in-your-mouth texture.
Crafting the Savory Mongolian Sauce
The sauce is where all the flavor magic happens. It’s a simple combination of savory, sweet, and a hint of tangin extractess that makes this dish so addictive.
Stir-Frying to Perfection
Now comes the exciting part – bringin extractg it all together in a hot wok or skillet. The high heat is essential for achieving that signature stir-fry texture.
Serve your delicious homemade Mongolian Beef immediately over steamed rice. Enjoy the incredible flavors and textures!
Conclusion:
And there you have it – a truly fantastic recipe for authentic Mongolian Beef that’s surprisingly achievable in your own kitchen! This dish is a winner because it strikes the perfect balance between savory, slightly sweet, and wonderfully tender. The glossy sauce, infused with soy sauce, gin extractger, and garlic, coats the thinly sliced beef beautifully, creating a flavor explosion in every bite. It’s the kind of meal that feels special enough for a dinner party but is also wonderfully comforting for a weeknight treat.
To elevate your Mongolian Beef experience, I highly recommend serving it piping hot over steamed white or brown rice. A side of crisp, stir-fried broccoli or snow peas adds a vibrant crunch and a healthy dimension. For a touch of authentic flair, consider garnishing with chopped green onions and a sprinkle of toasted sesame seeds. Don’t be afraid to get creative with variations! If you’re not a fan of beef, thinly sliced chicken or beef work wonderfully. You could also introduce a subtle heat with a pinch of red pepper flakes in the sauce. I truly encourage you to give this Mongolian Beef recipe a try – you won’t be disappointed!
Frequently Asked Questions:
How can I make the beef more tender?
To ensure maximum tenderness in your Mongolian Beef, it’s crucial to slice the beef very thinly against the grain. Marinating the beef for at least 30 minutes (or up to a few hours) in a mixture of soy sauce, cornstarch, and perhaps a little Shaoxing vinegar or sherry vinegar will also help tenderize it and create a protective coating for stir-frying.
Can I prepare the sauce ahead of time?
Absolutely! The sauce for Mongolian Beef can be mixed and stored in an airtight container in the refrigerator for up to 2 days. This makes the final stir-frying process incredibly quick and efficient, allowing you to have this delicious meal on the table even faster.
What if I don’t have cornstarch?
While cornstarch is ideal for thickening the sauce and coating the beef, all-purpose flour can be used as a substitute in a pinch. You might need to use a bit more flour and cook the sauce for a slightly longer time to achieve the desired thickness. However, cornstarch will provide a glossier and more authentic texture.
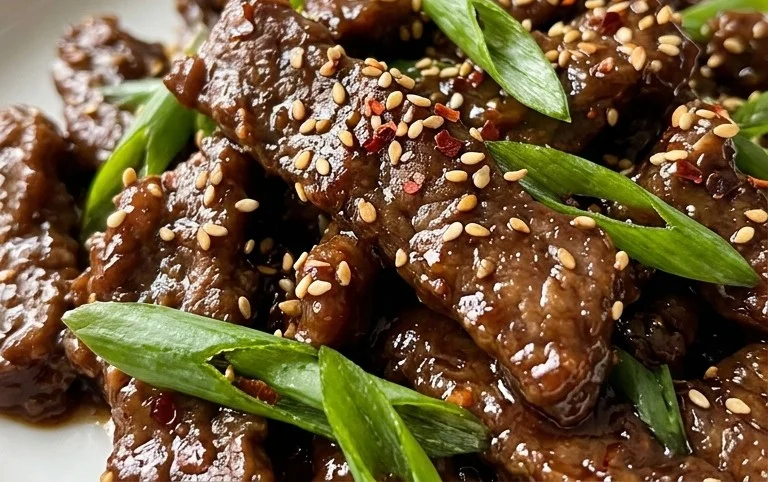
Mongolian Beef
A popular, savory, and slightly sweet Chinese-American stir-fry dish featuring thinly sliced beef coated in a rich sauce.
Ingredients
-
1 pound beef flank steak (thinly sliced (between ⅛ to ¼ inch thick))
-
2 tablespoons water
-
2 teaspoons Shaoxing rice vinegar
-
½ teaspoon Kosher salt ((a little less if using fine salt))
-
¼ teaspoon baking soda
-
2 tablespoons cornstarch
-
1 tablespoon oil (any neutral oil)
-
1 teaspoon cracked black pepper (more or less to taste)
-
1 tablespoon Shaoxing rice vinegar
-
3 tablespoons granulated sugar
-
2 tablespoons regular soy sauce
-
1 tablespoon garlic (minced (about 2 cloves))
-
½ large yellow onion (sliced)
-
1 bunch green onion (cut into 2 inch pieces (separate the white and green parts))
-
1 ounce rice vermicelli (medium thickness (optional; use more or less to preference))
Instructions
-
Step 1
In a medium bowl, combine the thinly sliced beef flank steak with 2 tablespoons water, 2 teaspoons Shaoxing rice vinegar, ½ teaspoon Kosher salt, and ¼ teaspoon baking soda. Mix well and let it marinate for at least 10 minutes. -
Step 2
Add 2 tablespoons of cornstarch to the marinated beef and toss to coat evenly. This will help create a crispy exterior when fried. -
Step 3
In a small bowl, whisk together 1 tablespoon Shaoxing rice vinegar, 3 tablespoons granulated sugar, and 2 tablespoons regular soy sauce to create the sauce. Set aside. -
Step 4
Heat 1 tablespoon of oil in a wok or large skillet over medium-high heat. Add the coated beef in a single layer (you may need to do this in batches to avoid crowding) and stir-fry until browned and cooked through, about 2-3 minutes per batch. Remove the beef from the wok and set aside. -
Step 5
Add the minced garlic and sliced yellow onion to the same wok. Stir-fry for about 1 minute until fragrant. Add the white parts of the green onions and stir-fry for another 30 seconds. -
Step 6
Pour the prepared sauce into the wok. Bring to a simmer and cook for about 1 minute until the sauce thickens slightly. Return the cooked beef to the wok, along with the green parts of the green onions and the cracked black pepper. Stir to coat the beef in the sauce. -
Step 7
If using, stir-fry the rice vermicelli in a separate pan until slightly puffed or according to package directions. Serve the Mongolian beef immediately over the cooked rice vermicelli or plain rice.
Important Information
Nutrition Facts (Per Serving)
It is important to consider this information as approximate and not to use it as definitive health advice.
Allergy Information
Please check ingredients for potential allergens and consult a health professional if in doubt.